Difference between revisions of "Jet Pack War"
From Worms Knowledge Base
| Line 75: | Line 75: | ||
==== [[Ming Vase]] ==== | ==== [[Ming Vase]] ==== | ||
| − | |||
The single exemplar with a delay of 5 turns is provided to cause devastation where necessary later in the game. It can be very useful when you are about to lose, or when you need to kill a worm with a lot of HP. Use the Ming Vase when a group of your opponents' worms are close to each other (for the clusters kill everybody). It can also be helpful when placed underneath a worm with a lot of HP to make all the clusters explode at once (the same way as the [[Cluster_Bomb#Tactics|Cluster Bomb's trick]]), making the worm fly very high and receiving a lot of damage. | The single exemplar with a delay of 5 turns is provided to cause devastation where necessary later in the game. It can be very useful when you are about to lose, or when you need to kill a worm with a lot of HP. Use the Ming Vase when a group of your opponents' worms are close to each other (for the clusters kill everybody). It can also be helpful when placed underneath a worm with a lot of HP to make all the clusters explode at once (the same way as the [[Cluster_Bomb#Tactics|Cluster Bomb's trick]]), making the worm fly very high and receiving a lot of damage. | ||
Revision as of 08:31, 25 July 2010

|
W:A replay: A Jet Pack War match using the first version of the scheme, with FoxHound and Bob-MarleyCassio |
| Download · Info |
| Game setup |
|---|
| Scheme |
| Jet Pack War: |
| Map |
| Open island maps. Best played on maps where the Jet Pack can go through anywhere. |
| Worms |
| As many as the map will support for automatic placement |
Jet Pack War (or JPW) is a scheme based on Hysteria. The premise is that the worms have 4 seconds per turn to attack with drop-and-run weapons from the Jet Pack. The objective is to eliminate all opponents' worms and survive.
Contents
[hide]Detailed information and tips
General
Since artillery mode (anchor mode) is enabled, worms must move and attack from the Jet Pack. It needs to be fast because of the 4 seconds of turn time. A health crate containing 35 health will be placed each turn. Fall Damage is set to 508% and worm health is set to 155, so players must be careful not to fall from high enough to take fall damage. Retreat time is set to 5 seconds to facilitate the collection of crates and hiding after an attack. The map has only mines as objects. When Sudden Death strikes after 80 seconds of spent turn time, no more health crates will appear and the water will rise. Due to the limited time to attack it is very important to choose your weapons fast, so learning all the required F-keys helps a lot.
Each player is equipped with the following itens:
- 3 Teleports
- Infinite Jet Pack
- 1 Low Gravity
- Infinite Dynamite
- 3 Mines
- 1 Ming Vase
- Unlimited Mad Cows
Map
In order to simplify the game map and make it easier to be chosen in the lobby, 3 Teleports were provided to escape from closed areas in the begining of the game. But an ideal map should be an open island map, be able to do the players access every surface on the map, this way no one would lose a turn to teleport away from the closed area. Choosing an open island map without closed spaces allows this. Bridges and other map objects may close areas of the map, so setting Bridge and Terrain object counts to 1 in the Map Editor is more guaranteed.
Utilities and weapons
Teleports
The 3 teleports were provided to escape from closed areas in the begining of the game, go to far places where the Jet Pack wouldn't reach, collect difficult crates and hide.
Jet Pack
It is infinite, the only way to move, with initial fuel value of 30 and with 5 seconds of retreat time.
- Fuel
When a worm is in a lower place, going higher will require a lot of fuel. Bear this in mind, as running out of fuel and taking a fall with the 508% of fall damage may kill your worm. Another choice is to attack a worm in a lower place and use the retreat time to get up.
- Dropping explosives back
Sometimes when you drop an explosive forward, it hits your worm and does not fall as you had aimed. A good way to avoid this is by releasing the explosive with the worm facing back.
- Retreat Time
It can be used to push mines onto the enemy, collect health crates, receive more time to escape, and cover for the loss of fuel.
- Deactivation
- Pressing space resets all horizontal velocity, which is handy for landing on isolated pixels where you are a difficult target.
- Running out of Jet Pack's retreat time keeps the worm's movement. This can be useful if landing with no care about if the worm will hit or slide on the terrain. This tip can be explored on decline terrains.
Low Gravity
The single exemplar is useful for drowning the opponent's worms. It can be combined with:
- Dynamites - When the dynamite is well positioned, the probability to make a worm drown is average. If badly positioned: low.
- Mines - When the mine is well positioned, the probability to make a worm drown is high. If badly positioned: average.
- Ming Vase - The clusters will go onto a larger area and the probability to make a worm drown is very high.
- Mad Cows - Not a good idea, because the cows won't explode and there's only one Low Gravity. However, the cows will fall a little bit further and this might help to collect health crates.
Dynamite
Infinite, 15% weaker (significantly hindering its ability to launch worms into water from a long distance) and the most used weapon to deal damage of the game. When you need more time to move, dropping a dynamite will activate the retreat time, giving you extra time to hide and collect crates. Dynamite's maximum damage is 59 (without fall damage). It is useful for dealing damage without wasting ammo. It can also help you to know when the retreat time of the Jet Pack will end: when the dynamite explode (after the time reaches 0).
Mines
- Player
With x3 ammo and 58% more powerful, they are stronger than the dynamites and with the same crater diameter of the conventional dynamite power, enabling them to launch worms into the water from long distances. If you drop one and it does not activate, remember where it is, because it can't be distinguished from terrain mines and will deal a lot more damage (maximum is 72, without fall damage).
- Terrain
They can be pushed by the Jet Pack to do an extra attack and if the player aims well or just has luck, they can make a combo in the attack. They are with conventional power.
Ming Vase
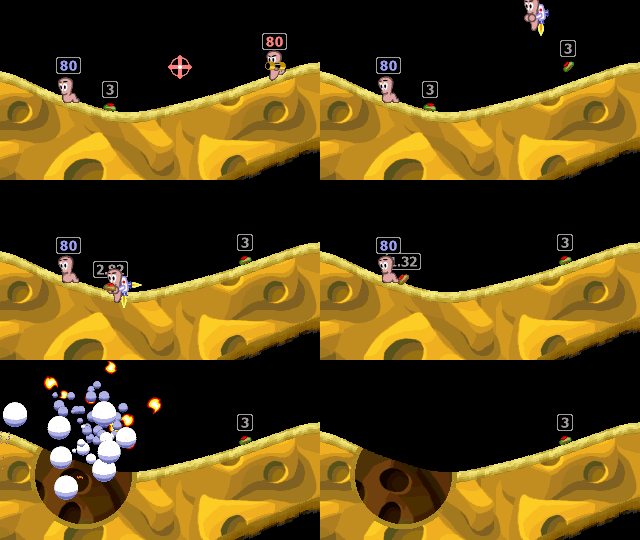
The single exemplar with a delay of 5 turns is provided to cause devastation where necessary later in the game. It can be very useful when you are about to lose, or when you need to kill a worm with a lot of HP. Use the Ming Vase when a group of your opponents' worms are close to each other (for the clusters kill everybody). It can also be helpful when placed underneath a worm with a lot of HP to make all the clusters explode at once (the same way as the Cluster Bomb's trick), making the worm fly very high and receiving a lot of damage.
Mad Cows
They are unlimited and will not explode (power above 20). Useful to collect health crates and do not blow your own worms or the terrain if the time/fuel is running out. It is possible to drop 1-5 cows. If you drop 2 or more cows, the chance of collecting a health crate will be higher than 1, but the retreat time of the Jet Pack will only be activated after the drop of the last cow, so the more more cows you drop, the more you can fly, but you'll need more fuel for that.
Strategies
Some of the strategies are from Hysteria and can be applied here as well.
Stocking up on HP
Giving 35HP to a worm for each crate, the health crates can make a worm with very low HP become quite healthy again, giving another chance for someone about to lose. So if your opponent has little HP, don't leave crates left. They can also compensate for the increased Fall Damage, giving worms more HP to cope with the falls.
Administering the opponent's worms
Since the health crates give 35HP, worms with very low HP can become quite healthy again. Killing those worms will not let the opponent take this advantage. On the other hand, if the opponent has less worms than you, he/she can explore the worm rotation to easily kill your worms.
Killing healthy worms at once
Sometimes an opponent worm is too healthy. When this happens, kill it at once will be very helpful. The easier way is by drowning it into the water (the Low Gravity can be very useful for this), but the Fall Damage can be explored too, however it will require notion about the activation "failure" and the damage taken by the fall.
Hiding far away from the opponent
It can be useful when you want to protect yourself against attacks, and search for health crates to receive more HP. This method can also make the opponent stop in the middle of the map (on a tentative to attack), making this way an easy method to attack him/her without recieving damage.
Waiting for Sudden Death
Waiting for the sudden death may be very useful to easily kill worms. It stops the appearence of health crates, as well as letting the water rise.
History
FoxHound created this scheme in 2009 thinking about making a scheme with short turn time like Hysteria, using the Jet Pack more and with no rules. The scheme's original name was Jet for Boom, but it was renamed to gain popularity, after Lex's suggestions. The scheme had been created, tested and divulged before the existence of the Worms Scheme Contest, so when the scheme was sent to the 2010 contest it was not accepted due to the rule: "The scheme has to be completely unseen by the public before and during the contest.".
On July 2010, teleports were added to the scheme after Fighter's suggestion. Before then, the scheme could only be played on the recommended map. A few days after, cows were added to the scheme too.

