Difference between revisions of "Mission walkthrough (Worms World Party)"
From Worms Knowledge Base
Qwertyxp2000 (Talk | contribs) (→Mission 16 - Bookworm) |
(→See also: Training Disciplines) |
||
| (22 intermediate revisions by 2 users not shown) | |||
| Line 1: | Line 1: | ||
| − | {{ParentArticle|[[Missions]]}} | + | {{ParentArticle|[[Guides, FAQs, and ReadMes]] or [[Missions]]}} |
| − | [[file:Thumb0.png|thumb|Missions]] | + | [[file:Thumb0 (WWP).png|thumb|Missions]] |
'''Disclaimer:''' The following textual guides are by far not the only ways of beating WWP's missions. They are only meant to help you out when you're out of ideas. | '''Disclaimer:''' The following textual guides are by far not the only ways of beating WWP's missions. They are only meant to help you out when you're out of ideas. | ||
| Line 12: | Line 12: | ||
[[file:Thumb1 - Good Ship Armageddon.png|thumb|Good Ship Armageddon]] | [[file:Thumb1 - Good Ship Armageddon.png|thumb|Good Ship Armageddon]] | ||
Your aim is to collect the vital crate at the top of the ship. Use the two girders to get up from the rowboat. Afterwards, use your Jetpack to lift yourself up above the ship's flag. Don't worry if you can't immediately jetpack to the vital crate; the crate nearby the vital crate contains a Teleport. | Your aim is to collect the vital crate at the top of the ship. Use the two girders to get up from the rowboat. Afterwards, use your Jetpack to lift yourself up above the ship's flag. Don't worry if you can't immediately jetpack to the vital crate; the crate nearby the vital crate contains a Teleport. | ||
| + | |||
| + | On the Silver attempt and below, the game will supply you with a free Low Gravity crate on the boat so you can jump off the boat more efficiently from your girders. | ||
<br clear="all"> | <br clear="all"> | ||
| Line 27: | Line 29: | ||
[[file:Thumb4 - Shell Shock.png|thumb|Shell Shock]] | [[file:Thumb4 - Shell Shock.png|thumb|Shell Shock]] | ||
This mission is much different from a typical beat-the-enemy mission; health crates stock up "ammo" for the ship that your worm is riding upon. The intended solution for this mission is to collect a certain number of health crates, drop to the seat of the ship, and the mines will shoot at the enemy worms like a cannon. The girder provided will provide some protection against the shock of the mines. | This mission is much different from a typical beat-the-enemy mission; health crates stock up "ammo" for the ship that your worm is riding upon. The intended solution for this mission is to collect a certain number of health crates, drop to the seat of the ship, and the mines will shoot at the enemy worms like a cannon. The girder provided will provide some protection against the shock of the mines. | ||
| + | |||
| + | You could simply use the knockback of the mines to send you to the island and then shove yourself down slopes to knock enemy worms downhill, if that's what is preferred. It's quicker but more risky and skillful to perform. You won't lose this mission if your worm is lost, only if there are still enemy worms alive. | ||
<br clear="all"> | <br clear="all"> | ||
| Line 38: | Line 42: | ||
== Mission 6 - Take Out The Trash == | == Mission 6 - Take Out The Trash == | ||
| − | [[file:Thumb6 - Take Out The | + | [[file:Thumb6 - Take Out The Trash.png|thumb|Take Out The Trash]] |
Use a girder to get up between the first building and the tall left building. Some mines will rain down from above after the end of the opponent's turn, between the two tall buildings. You will need to be careful with placing the next girders; try spacing the girders to avoid the mines falling on them. Use your Low Gravity once you reached the tall right building, and quickly run and jump to the bottom while your Low Gravity is active. Collect that vital crate, which contains a Patsy's Magic Bullet, and aim at the middle of the three enemy worms. | Use a girder to get up between the first building and the tall left building. Some mines will rain down from above after the end of the opponent's turn, between the two tall buildings. You will need to be careful with placing the next girders; try spacing the girders to avoid the mines falling on them. Use your Low Gravity once you reached the tall right building, and quickly run and jump to the bottom while your Low Gravity is active. Collect that vital crate, which contains a Patsy's Magic Bullet, and aim at the middle of the three enemy worms. | ||
| Line 45: | Line 49: | ||
== Mission 7 - Missile Base == | == Mission 7 - Missile Base == | ||
[[file:Thumb7 - Missile Base.png|thumb|Missile Base]] | [[file:Thumb7 - Missile Base.png|thumb|Missile Base]] | ||
| − | Use your Blowtorches to traverse through the terrain. Be mindful of how you use your Blowtorches and where you begin and move your worm. Also mind that the opponent can throw Grenades at you; before ending each turn, retreat to the middle of a tunnel, where Grenades won't be so useful. | + | Use your Blowtorches to traverse through the terrain. Be mindful of how you use your Blowtorches and where you begin and move your worm. Also mind that the opponent can throw Grenades at you; before ending each turn, retreat to the middle of a tunnel, where Grenades won't be so useful. You also have some Girders and Bungees in your inventory. |
| + | |||
| + | If you get stuck, the Silver attempts and below will offer you an extra crate containing 1 extra Blowtorch. | ||
<br clear="all"> | <br clear="all"> | ||
| Line 57: | Line 63: | ||
== Mission 9 - Jumpjet Defense == | == Mission 9 - Jumpjet Defense == | ||
[[file:Thumb9 - Jumpjet Defense.png|thumb|Jumpjet Defense]] | [[file:Thumb9 - Jumpjet Defense.png|thumb|Jumpjet Defense]] | ||
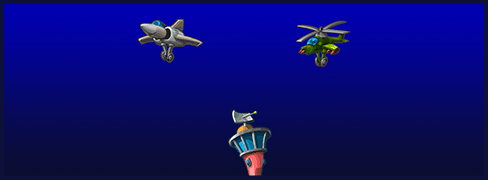
| − | Be careful when using your Jetpack to avoid the activated Armageddon to kill the enemy worm. Anticipate where the meteors of the Armageddon will aim. You have 200 fuel for your Jetpack in this mission. | + | Be careful when using your Jetpack to avoid the activated Armageddon to kill the enemy worm. Anticipate where the meteors of the Armageddon will aim. You have 200 fuel for your Jetpack in this mission. You can protect yourself somewhat by hiding underneath the aircraft. |
| + | |||
| + | Another way to complete the mission is to use your Jetpack as high as possible, enough to avoid the showering Armageddon meteors completely, but watch out for where you land after the Armageddon ends! | ||
<br clear="all"> | <br clear="all"> | ||
== Mission 10 - Operation Alcatraz == | == Mission 10 - Operation Alcatraz == | ||
[[file:Thumb10 - Operation Alcatraz.png|thumb|Operation Alcatraz]] | [[file:Thumb10 - Operation Alcatraz.png|thumb|Operation Alcatraz]] | ||
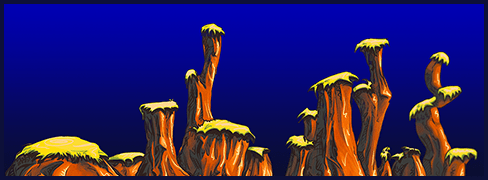
| − | The hardest part of this mission actually is to perform jumps correctly with your Low Gravity in use. To correctly jump over the boat with your two backflips, the first backflip should reach the leaf of the boat, and don't be afraid to stay close to the edge afterwards to make the second backflip up to the mast. You will need to find a way to get across to the island with your respectable amount of weapons available. Destroying the enemies with direct line of sight before reaching for that vital crate may be useful if you cannot complete the manoeuver to that vital crate after your second turn. | + | Collect the vital crate behind that prison building with your utility tools. You have a generous selection of utility tools, including Low Gravity and Jetpack (via the utility crate on the island), plus Parachutes, Bungees, Blowtorches. You also have a few directly offensive weapons to dispatch the enemy if you wish. |
| + | |||
| + | The hardest part of this mission actually is to perform jumps correctly with your Low Gravity in use. To correctly jump over the boat with your two backflips, the first backflip should reach the leaf of the boat, and don't be afraid to stay close to the edge afterwards to make the second backflip up to the mast. You will need to find a way to get across to the island with your respectable amount of weapons available. Destroying the enemies with direct line of sight before reaching for that vital crate may be useful if you cannot complete the manoeuver to that vital crate after your second turn. Another hard part of the mission is efficiently using the Jetpack's measly 15 fuel to safely get up to or above the peak of the building. | ||
| + | |||
| + | If you get stuck, the Silver attempt and below may offer you an extra crate on top of the boat, containing 1 Bazooka. | ||
<br clear="all"> | <br clear="all"> | ||
| Line 72: | Line 84: | ||
== Mission 12 - Fruit Bastilles == | == Mission 12 - Fruit Bastilles == | ||
[[file:Thumb12 - Fruit Bastilles.png|thumb|Fruit Bastilles]] | [[file:Thumb12 - Fruit Bastilles.png|thumb|Fruit Bastilles]] | ||
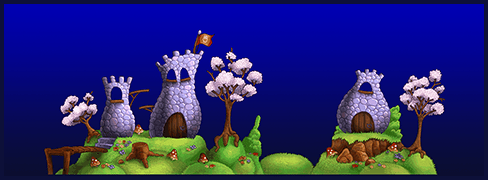
| − | Hurry yourself with the Jetpack (which has a measly 6 units of fuel in this mission) to get up the cherry blossom tree, and use your Low Gravity to jump across the two castles. There is a target that you can destroy with any of your weapons to deploy a crate containing a Fire Punch. The crate will float down towards the mines at the grass, so you would need a Girder in advance to stop its fall. Bungee yourself down the right tree and use your available offensive weapon to send the enemy into the water. Spend as few turns as possible, before the enemy unlocks new weapons to attack you or your helpless vital worm. Note that in this mission, you can perform multiple weapons on your turn, allowing you to use a Girder and a Baseball Bat on the same turn to secure the Fire Punch crate. | + | Hurry yourself with the Jetpack (which has a measly 6 units of fuel in this mission) to get up the cherry blossom tree, and use your Low Gravity to jump across the two castles. There is a target that you can destroy with any of your weapons to deploy a crate containing a Fire Punch. The crate will float down towards the mines at the grass, so you would need a Girder in advance to stop its fall. Bungee yourself down the right tree and use your available offensive weapon to send the enemy into the water. Spend as few turns as possible, before the enemy unlocks new weapons to attack you or your helpless vital worm. Note that in this mission, you can perform multiple weapons on your turn, allowing you to use a Girder and a Baseball Bat on the same turn to secure the Fire Punch crate. Still, you only have 30 seconds per turn. |
<br clear="all"> | <br clear="all"> | ||
| Line 78: | Line 90: | ||
[[file:Thumb13 - Stairway to Armageddon.png|thumb|Stairway to Armageddon]] | [[file:Thumb13 - Stairway to Armageddon.png|thumb|Stairway to Armageddon]] | ||
:''Note: the name of this mission is probably a reference to the song [[w:Stairway_to_Heaven|Stairway to Heaven]] by [[w:Led Zeppelin|Led Zeppelin]] (see References to other media).'' | :''Note: the name of this mission is probably a reference to the song [[w:Stairway_to_Heaven|Stairway to Heaven]] by [[w:Led Zeppelin|Led Zeppelin]] (see References to other media).'' | ||
| − | Shotgun the targets to help get up to the top, building " | + | Shotgun the targets to help get up to the top, building "stairs" of the staircases. As you make way up the ladders, remember to conserve your Shotguns. Note that you can destroy up to two adjacent targets with each Shotgun shot; aim between the two targets to achieve this. The second and third "staircases" contain mines that you'd need to dispatch with your Shotgun. The second "staircase" just involves removing one target to push down the layers of the third column. The third "staircase" requires you to knock back the mine with the destruction of a target; aim at the mine such that it falls off the stacks of targets. You can afford to use the Skip Go if you're running out of time, but be sure to use all two shots from each Shotgun first or else you'll waste the free last shots. |
| − | If you get stuck on this level, the game may offer you extra Shotguns. | + | Creating the "stairs" with your limited Shotguns is not your only problem. As you get up the "stairs", you will need to jump over the targets competently. The first leap to the stairs requires at least 1 target tall to jump over, you can jump up to just over 2 targets tall with a backflip, and you must never get within range of the mines (which all have 1 second fuse time) or else your puny 5 health will become nothing. Fortunately, you are still able to perform close-range Shotgun shots to simultaneously hit two targets without blasting your worm. |
| + | |||
| + | If you get stuck on this level, the game may offer you a crate with a Laser Sight, and if you are really stuck, the game may provide you a crate with an extra 2 Shotguns. These are the anti-milestones for the Silver and Bronze stages, respectively. | ||
<br clear="all"> | <br clear="all"> | ||
| Line 86: | Line 100: | ||
== Mission 14 - Rainforest Ruckus == | == Mission 14 - Rainforest Ruckus == | ||
[[file:Thumb14 - Rainforest Ruckus.png|thumb|Rainforest Ruckus]] | [[file:Thumb14 - Rainforest Ruckus.png|thumb|Rainforest Ruckus]] | ||
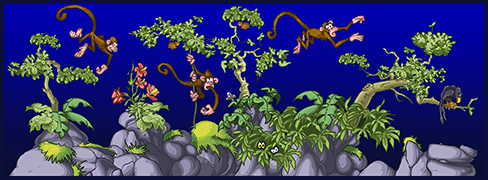
| − | In this mission, your aim is to use the Ninja Rope to move around the landscape and launch your limited weapons at your enemies as quickly as possible within your available turns. Luckily, in this mission, using a weapon will not trigger retreat time; you can spam weapons at your leisure. Unlike you, your enemy will fire slowly | + | In this mission, your aim is to use the Ninja Rope to move around the landscape and launch your limited weapons at your enemies as quickly as possible within your available turns. Luckily, in this mission, using a weapon will not trigger retreat time; you can spam weapons at your leisure. Unlike you, your enemy will fire slowly, cannot move, but they can choose any of their worms to start blasting you. Your worm has 150 health. Each team has 35 seconds per turn. |
| − | To begin, you will need to Blowtorch out of | + | You start with 8 Grenades, 8 Cluster Bombs, 1 Girder, 6 Blowtorches, and, most importantly, infinite Ninja Ropes. There is also a Shotgun crate near the tail of the left monkey, but that crate is way beyond your normal reach without getting into a vulnerable position. |
| + | *For the Ninja Rope, you must learn at least the technique of performing mid-air roping and the jump-and-rope tactic to adequately get through this mission, but it is recommended you additionally learn how to perfect the upwards roping technique. | ||
| + | *It is best to use those Grenades and Cluster Bombs to carpet-bomb from your Ninja Rope to your nearby enemies. | ||
| + | *Use your Blowtorches to get out of tunnels and also hide somewhat from your enemy. | ||
| + | *The Girder is completely optional, but you can use this to gain leverage to your grenade weapons or bridge the landscape for your worm. | ||
| + | |||
| + | The enemy is a CPU 5, meaning they have the best AI-programmed accuracy in the game, and they have full access to unlimited supplies of Bazookas, Grenades, Shotguns, and Air Strikes (unlocked after their 3rd turn). There are a total of three enemy worms: one on opposite sides, with 150 health each, and another worm at the top with only a measly 50 health. You can try to outsmart their AI by standing on any of the enemy worms' heads, or position in a location where no enemy worm is able to get a clear shot out of you. You could try to stall their turns and hope for them to make an unlucky shot that forfeits their turn or gives you a navigational advantage, but bear in mind that the match time is only about 15 minutes before Sudden Death begins, and by Sudden Death the mission would become a loss. | ||
| + | |||
| + | To begin, you will need to Blowtorch out of any side to then Ninja Rope your way around the landscape as you mercilessly target your exposed enemies with your weapons. You will need to show proficiency with the Ninja Rope to get around the landscape, rather than wasting your weapons to just plow through the landscape. Learning how to retreat from your rope after dropping weapons is an important skill, allowing you to perform a tactic involving carpet-bombing enemy worms with your Grenades or Cluster Bombs; it takes less time to carpet-bomb than to manually throw them. If you're struggling to get a good act of carpet-bombing from your Ninja Rope, try standing right on top of the enemy worm's head, stick the rope diagonally at 45-degrees, then carpet-bomb up to a certain number of grenade weapons with max fuse time, and finally rope off before the explosions end up hurting you. | ||
It is possible to complete this mission in one single turn. However, most players will have difficulty roping around the entire landscape within the 35 seconds per turn ''and'' still kill all three enemy worms; if you're having trouble, always aim for the most exposed worm in your turn and ensure that worm is dead by the end of your turn. | It is possible to complete this mission in one single turn. However, most players will have difficulty roping around the entire landscape within the 35 seconds per turn ''and'' still kill all three enemy worms; if you're having trouble, always aim for the most exposed worm in your turn and ensure that worm is dead by the end of your turn. | ||
| + | |||
| + | If you're stuck on this mission, the Bronze stage will provide a nearby Health Crate worth +50 health. | ||
| + | |||
<br clear="all"> | <br clear="all"> | ||
== Mission 15 - Castle Hassle == | == Mission 15 - Castle Hassle == | ||
[[file:Thumb15 - Castle Hassle.png|thumb|Castle Hassle]] | [[file:Thumb15 - Castle Hassle.png|thumb|Castle Hassle]] | ||
| + | You must reach towards the end of the landscape with your utilities to acquire the almighty Armageddon and kill every single enemy. As the Armageddon has an element of RNG, a single Armageddon still may allow one or more enemies to survive; to be safe, kill the first enemy worm with your Fire Punch. Your enemies are immobile but armed with weapons, so find a location that will protect you between turns. Take advantage of your Jetpack, Low Gravities, and Girders to get around the terrain. You will also be supplied with a Bungee and Ninja Rope (plus one more Ninja Rope with another crate). Use your utilities to move around the second castle and then hide beneath it with your Blowtorches. Your worm actually doesn’t have to survive in order to win this mission, so feel free to use all of your Blowtorches at your will; just use your Armageddon to kill every enemy worm on screen and you've won the mission. | ||
| + | |||
| + | If you get stuck, the Silver and below attempts may offer you a nearby crate containing an extra Ninja Rope. | ||
<br clear="all"> | <br clear="all"> | ||
| Line 100: | Line 128: | ||
[[file:Thumb16 - Bookworm.png|thumb|Bookworm]] | [[file:Thumb16 - Bookworm.png|thumb|Bookworm]] | ||
Quickly navigate your way across the books so you can use your Prod to toss your enemy into the stacks of mines. But before then, watch out for the time. You will be supplied several Fast Walks to assist your otherwise sluggish movement speed. Your girders will be useful for protecting you from the enemy worm's Grenades. | Quickly navigate your way across the books so you can use your Prod to toss your enemy into the stacks of mines. But before then, watch out for the time. You will be supplied several Fast Walks to assist your otherwise sluggish movement speed. Your girders will be useful for protecting you from the enemy worm's Grenades. | ||
| + | |||
| + | If you get stuck, the Silver attempts and below will supply a utility crate containing a Jetpack with a measly 10 fuel. | ||
<br clear="all"> | <br clear="all"> | ||
== Mission 17 - Parachute Problems == | == Mission 17 - Parachute Problems == | ||
[[file:Thumb17 - Parachute Problems.png|thumb|Parachute Problems]] | [[file:Thumb17 - Parachute Problems.png|thumb|Parachute Problems]] | ||
| + | Quickly parachute across the platform to collect the crates as you travel to the small platform to smash that target with your Battle Axe within 30 seconds. Your first jump will be very important to begin the parachuting journey. Don't waste time thinking about how to begin, because you only have 30 seconds per turn. If you have to, you can use a Skip Go to hope for a more favorable wind direction, and also reset your turn time. | ||
| + | |||
| + | Remember that you can slightly adjust your parachute movements with the arrow keys. | ||
| + | *Up: Slows down the fall | ||
| + | *Down: Speeds up the fall | ||
| + | *Left: Push slightly to the left | ||
| + | *Right: Push slightly to the right | ||
<br clear="all"> | <br clear="all"> | ||
== Mission 18 - Pole To Pole == | == Mission 18 - Pole To Pole == | ||
[[file:Thumb18 - Pole To Pole.png|thumb|Pole To Pole]] | [[file:Thumb18 - Pole To Pole.png|thumb|Pole To Pole]] | ||
| + | Much like Apple Of Your Eye, this is a mission that relies on timing your jumps to avoid the moving mines. However, the platforms are straight and mines bounce upwards from the bottom. You got a generous 100 seconds to reach the final platform to kill the enemy worm with the crate containing a Fire Punch, but you'll need to be extra prepared to dodge all of the mines. As your worm only has 10 health, a single mine explosion is enough to lose the mission. | ||
| + | |||
| + | As a tip, jump to the next platform after the mines fall down, and time a backflip to dodge mines on your current platform. | ||
<br clear="all"> | <br clear="all"> | ||
== Mission 19 - Island Antics == | == Mission 19 - Island Antics == | ||
[[file:Thumb19 - Island Antics.png|thumb|Island Antics]] | [[file:Thumb19 - Island Antics.png|thumb|Island Antics]] | ||
| + | Not very straightforward of a mission, and also the first mission where you must ''destroy'' a vital crate to win the mission. The order for completing this mission roughly goes like this: | ||
| + | # Jetpack your first worm to the crate near the frontfacing moai. It contains a Longbow. Skip turn. The enemy worm will also skip turn on their first turn. | ||
| + | # Your second worm will try to dispatch the instant-timed mine on the trap. Use the Longbow. Optionally, you have the Laser Sight to allow you to accurately target. If you intend to use your second worm, make sure that worm is out of its original spot, or else Step 5 will be messed up. Enemy worm will skip turn once again. | ||
| + | # Your first worm will use a Low Gravity to backflip to the frontfacing moai, then backflip to the large palm tree, jump off the palm tree by jumping off the oil drum to avoid the two mines, and try to collect the Utility Crate nearby. The Utility Crate contains a Low Gravity. You must collect that crate in order to summon the rest of the crates. If a mine is in the way, dispatch the mine with your Handgun so you can collect a Utility Crate safely. Enemy worm should again just skip turn. | ||
| + | # If your second worm is still not dead, skip turn. Enemy worm should again just skip turn. | ||
| + | # Your first worm should collect the final crates towards the left with the aid of your currently available utility weapons. If you manage to collect the final crate leftwards of the island, you will need to safely destroy the vital crate with any of your worms. '''Do not attempt to collect the vital crate.''' | ||
<br clear="all"> | <br clear="all"> | ||
== Mission 20 - Berlin Boss == | == Mission 20 - Berlin Boss == | ||
[[file:Thumb20 - Berlin Boss.png|thumb|Berlin Boss]] | [[file:Thumb20 - Berlin Boss.png|thumb|Berlin Boss]] | ||
| + | Navigate the terrain and get to that vulnerable enemy vital worm at the right side and push it to inevitable doom, right into the pit of mines. Enemy worms are armed with Grenades, and you should use your Girders to protect you and get up tall areas. A single Shotgun, some Blowtorches, and one 10-fuel Jetpack will also be provided in your inventory. Enemy worms each have an effective line of sight to hurl their Grenades.<!--will elaborate more of this later...--> | ||
<br clear="all"> | <br clear="all"> | ||
== Mission 21 - Windymill On High == | == Mission 21 - Windymill On High == | ||
[[file:Thumb21 - Windymill On High.png|thumb|Windymill On High]] | [[file:Thumb21 - Windymill On High.png|thumb|Windymill On High]] | ||
| + | Very few damaging weapons are at your arsenal, and you must travel across the deadly landscape of windmills and mines safely within just 70 seconds per turn. You can still allow for a second turn, but the only sensible way to kill the enemy worm is to just jump down to the hill, pushing your worm and the enemy worm down the hill, drowning them both. The game even explicitly states for this mission: ''There IS honour in death''. | ||
<br clear="all"> | <br clear="all"> | ||
== Mission 22 - Bunged Up == | == Mission 22 - Bunged Up == | ||
[[file:Thumb22 - Bunged Up.png|thumb|Bunged Up]] | [[file:Thumb22 - Bunged Up.png|thumb|Bunged Up]] | ||
| + | Use your rope to collect crates, which will additionally push enemy worms out of the "taps" so you can use your now-collected Bazookas (9 per crate) to kill them all. It's more recommended to use the splash damage of the Bazooka to knock multiple enemy worms into the real water, saving you some time and ammo to dispatch the left and right enemy worms. Shooting a weapon won't end your turn, but with just 30 seconds per turn, you gotta be quick with your roping and shooting. | ||
| + | |||
| + | If you end your turn, the enemy team will play. Note that the enemy for this mission cannot move, the land is indestructible, and can only use Air Strikes. Hiding underneath the taps is a good choice. | ||
<br clear="all"> | <br clear="all"> | ||
== Mission 23 - Steeple Jack == | == Mission 23 - Steeple Jack == | ||
[[file:Thumb23 - Steeple Jack.png|thumb|Steeple Jack]] | [[file:Thumb23 - Steeple Jack.png|thumb|Steeple Jack]] | ||
| + | There are two very low health enemy worms at the tall tower, one with just 1 HP and the other with 5 HP. With only two of your worms, they must somehow get to the other side and kill them both with no explosive weapons, firearms, or strikes in your inventory. In fact, the only things in your inventory is a Low Gravity, some Girders, and a Baseball Bat. There is a mine near the enemy that will be able to kill both of them with the splash damage of that mine and the 1 HP enemy worm's gravestone explosion. Batting one of your fellow worms as a projectile is one of many ways to trigger that mine.<!--will elaborate more later--> | ||
<br clear="all"> | <br clear="all"> | ||
== Mission 24 - Radical Rescue == | == Mission 24 - Radical Rescue == | ||
[[file:Thumb24 - Radical Rescue.png|thumb|Radical Rescue]] | [[file:Thumb24 - Radical Rescue.png|thumb|Radical Rescue]] | ||
| + | Jetpack to each of the crates safely while flying relatively efficiently. With 30 seconds on the clock and 150 fuel on your Jetpack, there are a total of 12 required utility crates (13 if including the final Double Damage utility crate) you must collect before you get a real weapon. You will not get extra fuel from collecting each crate, unlike Jetpack Training. If you collect enough of the utility crates, of which all but the last crate contains just useless Crate Spies, you will be presented with a weapon crate, containing a Holy Hand Grenade that you should dump near your enemy and fly off safely. | ||
<br clear="all"> | <br clear="all"> | ||
== Mission 25 - Roping With Dinosaurs == | == Mission 25 - Roping With Dinosaurs == | ||
[[file:Thumb25 - Roping With Dinosaurs.png|thumb|Roping With Dinosaurs]] | [[file:Thumb25 - Roping With Dinosaurs.png|thumb|Roping With Dinosaurs]] | ||
| + | Unlike your enemy worms, your only worm is immobile outside of a single Jetpack and the Ninja Rope that must be obtained via the first crate. Every other crate you collect from other islands of this cavern will contain Bazookas. You must be confident at roping horizontal and vertical distances in order to succeed this mission. You could also try launching Bazookas from your Ninja Rope if you're really confident about your rope skills. Kill every enemy worm, preferably by dunking them into the water, and you will win the mission. Enemy worms will be armed with Bazookas. The land is indestructible in this mission, so you can be assured that you always can end your turn unharmed. | ||
<br clear="all"> | <br clear="all"> | ||
== Mission 26 - Rescue Me == | == Mission 26 - Rescue Me == | ||
[[file:Thumb26 - Rescue Me.png|thumb|Rescue Me]] | [[file:Thumb26 - Rescue Me.png|thumb|Rescue Me]] | ||
| + | Two helpless vital worms of your team are stuck in an endless supply of mines that bounce them up and down. The goal is simple: slow down the descent of your poor vital worms with your Low Gravity, collect each of the Girder crates and intercept each of your vital worms with a Girder each, and show the enemy worm on the opposite side who is boss with the Prod. You will need quick reflexes for this mission. | ||
<br clear="all"> | <br clear="all"> | ||
== Mission 27 - Jegg Central == | == Mission 27 - Jegg Central == | ||
[[file:Thumb27 - Jegg Central.png|thumb|Jegg Central]] | [[file:Thumb27 - Jegg Central.png|thumb|Jegg Central]] | ||
| − | Depending on your version of the game, Jegg Central is completed in distinct ways. On the PC version, you will use your Longbow to create massive arrow bridges across the terrain and aim at targets, whereas on the PlayStation version you use Girders to bridge across and Shotguns to aim at targets. Either way, aim accurately at the targets from different points of the landscape, and then finally collect the very last crate before the timer runs out. | + | Depending on your version of the game, Jegg Central is completed in distinct ways. On the PC version, you will use your Longbow to create massive arrow bridges across the terrain and aim at targets, whereas on the PlayStation version you use Girders to bridge across and Shotguns to aim at targets. Either way, aim accurately at the targets from different points of the landscape, and then finally collect the very last crate before the timer runs out. |
| + | |||
| + | You only have 90 seconds to finish this mission. There is a nearby Fast Walk utility crate that you can use to increase running speed. In the PC version, you do still have a single Girder to potentially make bridging a bit easier. | ||
<br clear="all"> | <br clear="all"> | ||
== Mission 28 - Chase The Ace == | == Mission 28 - Chase The Ace == | ||
[[file:Thumb28 - Chase The Ace.png|thumb|Chase The Ace]] | [[file:Thumb28 - Chase The Ace.png|thumb|Chase The Ace]] | ||
| + | Get to the vital crate with your Blowtorches, Girders, Parachute, and Jetpack. There's a lot of mines on the landscape that you must avoid. Only 30 seconds per turn, and using a damaging weapon will end your turn. The enemy is pretty lazy, always skipping its first few turns.<!--will elaborate more later--> | ||
<br clear="all"> | <br clear="all"> | ||
== Mission 29 - Rule The Rooster == | == Mission 29 - Rule The Rooster == | ||
[[file:Thumb29 - Rule The Rooster.png|thumb|Rule The Rooster]] | [[file:Thumb29 - Rule The Rooster.png|thumb|Rule The Rooster]] | ||
| + | Beginning near the chicken, you must use your utility tools to get yourself to that leafy plant to kill the exposed enemy vital worm. You do have a Girder, Blowtorches, and Jetpack to allow to reach the leafy plant. Once you're in position, one downwards Shotgun shot should do the trick to kill that feeble worm.<!--will elaborate more later--> | ||
<br clear="all"> | <br clear="all"> | ||
== Mission 30 - Super Tricky Sheep == | == Mission 30 - Super Tricky Sheep == | ||
[[file:Thumb30 - Super Tricky Sheep.png|thumb|Super Tricky Sheep]] | [[file:Thumb30 - Super Tricky Sheep.png|thumb|Super Tricky Sheep]] | ||
| + | The intended solution is to keep using Super Sheep to collect crates while avoiding your helpless vital worms; collecting the crates with your Super Sheep will eventually give you Battle Axes that you can use to slash the health of your nearby enemy worms. | ||
| + | |||
| + | As your worm cannot move itself, you have to rely on your Super Sheep to do all the dirty work. You must be proficient with controlling your Super Sheep to win this mission. Also watch out for the automatic timer on the Super Sheep so you don't accidentally mid-air explode your vital worms. Your enemy worms will always skip their turns, so don't worry about what the enemy does, just your Super Sheep skills. If your worm dies, you lose because your vital worms will surrender, and likewise occurs if either of your vital worms die. | ||
| + | |||
| + | The alternate, less time-consuming but more risky method is to use your Super Sheep to explode midair to kill enemy worms but not enough damage to kill your worm. | ||
<br clear="all"> | <br clear="all"> | ||
== Mission 31 - Down On The Farm == | == Mission 31 - Down On The Farm == | ||
[[file:Thumb31 - Down On The Farm.png|thumb|Down On The Farm]] | [[file:Thumb31 - Down On The Farm.png|thumb|Down On The Farm]] | ||
| + | Pop the target so you can collect two Jetpacks, allowing you to then dispatch exposed enemy vital worms by pushing them into densely packed mines, or knock those mines to the worms. Be careful not to be the target of all those mines yourself! Your weapons alone will not be able to deal enough damage to get rid of all of them.<!--will elaborate more later--> | ||
<br clear="all"> | <br clear="all"> | ||
== Mission 32 - Icy Encounter == | == Mission 32 - Icy Encounter == | ||
[[file:Thumb32 - Icy Encounter.png|thumb|Icy Encounter]] | [[file:Thumb32 - Icy Encounter.png|thumb|Icy Encounter]] | ||
| + | A very typical deathmatch-style mission. Aside from getting your two worms upwards with Girders, digging through stumps with your Blowtorches, and collecting every crate you see to maximize your collection of offensive weaponry, the end goal is that you must eliminate your enemy. Take care not to get too exposed to your enemies at the end of each turn! Your enemies cannot move, but you can, and you also got more than enough Girders to be usable as protection. Your worms both have 100 health each.<!--will elaborate more later--> | ||
<br clear="all"> | <br clear="all"> | ||
== Mission 33 - Have No Fear, Old Dear == | == Mission 33 - Have No Fear, Old Dear == | ||
[[file:Thumb33 - Have No Fear, Old Dear.png|thumb|Have No Fear, Old Dear]] | [[file:Thumb33 - Have No Fear, Old Dear.png|thumb|Have No Fear, Old Dear]] | ||
| + | Using your Bazooka, kill all enemy worms hidden inside the indestructible wells, while avoiding the falling old women, all within 100 seconds of a single turn. Like the old women in Uzi Training, hitting an old woman loses time; damaging her makes her pop and removes 5 seconds from your remaining time. You cannot move, only standing on top of the windmill. The lack of wind means you only need to rely on the trajectory of each bazooka shot without accounting for wind direction. | ||
<br clear="all"/> | <br clear="all"/> | ||
== Mission 34 - Back And Forth == | == Mission 34 - Back And Forth == | ||
[[file:Thumb34 - Back And Forth.png|thumb|Back And Forth]] | [[file:Thumb34 - Back And Forth.png|thumb|Back And Forth]] | ||
| + | Toss your worm around the landscape back and forth to the left and right sides at least three times with your Ninja Rope, so you can stock enough Shotguns to go destroy that vital crate. The upwards Ninja Rope technique is a must for this mission, or else you'll never be able to reach the ordinary crates without getting brutalised by the instant-fuse mines. To destroy that vital crate, shoot four times into the thinnest region of the thick giraffe neck, then shoot a fifth time with your third Shotgun and finally use that sixth shot onto that vital crate.<!--will elaborate more later--> | ||
<br clear="all"/> | <br clear="all"/> | ||
== Mission 35 - Beachside Juggler == | == Mission 35 - Beachside Juggler == | ||
[[file:Thumb35 - Beachside Juggler.png|thumb|Beachside Juggler]] | [[file:Thumb35 - Beachside Juggler.png|thumb|Beachside Juggler]] | ||
| + | Get around the landscape so you can use Prod on your enemy worm and knock back that worm with your Minigun. Combined with the Low Gravity makes for a neat combination.<!--will elaborate more later--> | ||
<br clear="all"/> | <br clear="all"/> | ||
== Mission 36 - End Of The Line == | == Mission 36 - End Of The Line == | ||
[[file:Thumb36 - End Of The Line.png|thumb|End Of The Line]] | [[file:Thumb36 - End Of The Line.png|thumb|End Of The Line]] | ||
| + | Many crates, many mines, few utility tools and "shoveling" weapons, this mission will test your skills to traverse the landscape safely. You have two worms, where one of them will go fetch that vital crate.<!--will elaborate later--> | ||
<br clear="all"/> | <br clear="all"/> | ||
== Mission 37 - Take'em Down == | == Mission 37 - Take'em Down == | ||
[[file:Thumb37 - Take'em Down.png|thumb|Take'em Down]] | [[file:Thumb37 - Take'em Down.png|thumb|Take'em Down]] | ||
| + | Collect crates on small floating marbles with your Ninja Rope, destroying targets in the process with instant-fuse mines, and sinking the enemy vital worm lower and lower until there's nothing left. Be careful not to rope for too long, or else time will be up, and the enemy has many angles at which they could shoot you down with no trouble. The land is indestructible, your enemies only have firearms, and they definitely won’t be able to snipe you off any region outside their direct line of sight.<!--will elaborate later--> | ||
<br clear="all"/> | <br clear="all"/> | ||
== Mission 38 - Pie Eating Piper == | == Mission 38 - Pie Eating Piper == | ||
[[file:Thumb38 - Pie Eating Piper.png|thumb|Pie Eating Piper]] | [[file:Thumb38 - Pie Eating Piper.png|thumb|Pie Eating Piper]] | ||
| + | Pick off the target on the donkey's left ear with your Prod and jump to the donkey's right ear, automatically create health crates, repeat the process, until the crates gets close to the mines. Then you use a Ninja Rope to safely go down the donkey ''without touching the health crates'' and use Blowtorch to cut the legs of the donkey. The enemy worm should be foolish enough to just keep collecting health crates mindlessly till turn time is over. Then with that opportunity opening up, use Prod on that enemy worm and that worm will be sent to a crowd of mines. | ||
<br clear="all"/> | <br clear="all"/> | ||
== Mission 39 - Plane Crazy == | == Mission 39 - Plane Crazy == | ||
[[file:Thumb39 - Plane Crazy.png|thumb|Plane Crazy]] | [[file:Thumb39 - Plane Crazy.png|thumb|Plane Crazy]] | ||
| + | Get rid of the enemy worm at the very end of the landscape. To do this, you must go through the landscape by your assortment of Blowtorches, Girders, and Fire Punch to get closer to the enemy worm. There is a Prod crate that you can use to push the enemy worm into the water. The enemy worm always skips turns. You could use your Grenade to plop the enemy worm into the water, but beware that you only have 1 Grenade. | ||
| + | |||
| + | If you are skilled enough with the Grenade, you could get a perfect shot to beat the worm in one turn. You'll need to find a good location to throw the Grenade, however, and your starting location won't suffice. A Girder could set you up in a good position to throw that perfect Grenade. For speedrunning, it takes a minimum of two turns to win this mission. | ||
| + | |||
| + | If you are stuck, the game may supply you with a utility crate containing a Jetpack. This Jetpack has only 15 fuel. | ||
<br clear="all"/> | <br clear="all"/> | ||
== Mission 40 - All Aboard == | == Mission 40 - All Aboard == | ||
[[file:Thumb40 - All Aboard.png|thumb|All Aboard]] | [[file:Thumb40 - All Aboard.png|thumb|All Aboard]] | ||
| + | Plays almost like Mission 9 but you are now fully exposed. Now you must rely on dodging the meteors successfully. You still have 200 fuel for your Jetpack, fortunately. | ||
| + | |||
| + | Like Mission 9, you can always just Jetpack your way above the Armageddon completely and swiftly find a landing spot after the Armageddon ends. | ||
<br clear="all"/> | <br clear="all"/> | ||
== Mission 41 - Bungee Fun == | == Mission 41 - Bungee Fun == | ||
[[file:Thumb41 - Bungee Fun.png|thumb|Bungee Fun]] | [[file:Thumb41 - Bungee Fun.png|thumb|Bungee Fun]] | ||
| + | The thumbnail looks like nothing, but in reality, your worm is standing on a tiny platform ready to bungee down and eventually get rid of the two enemy worms on the other tiny platforms opposite your platform. Swing your bungee to the locations of the incoming crates. Time the swings and aim your worm. Once you get the last few crates, you will gain access to two Homing Missiles; just aim directly at a worm and drop the missile, twice. You do have a girder to save yourself after collecting every other crate, but that is optional. You have only 60 seconds in this mission. | ||
<br clear="all"/> | <br clear="all"/> | ||
== Mission 42 - Hindenburger == | == Mission 42 - Hindenburger == | ||
[[file:Thumb42 - Hindenburger.png|thumb|Hindenburger]] | [[file:Thumb42 - Hindenburger.png|thumb|Hindenburger]] | ||
| + | Navigation above the water with a short ceiling below can be difficult. Jetpack right near the hidden enemy worm and Fire Punch deploy from your Jetpack. Please do not mind the fall damage you take afterwards; as the enemy worm only has 30 health and your worms have far more health, just a single hit from your Fire Punch wins. | ||
| + | |||
| + | Note that some patches of the game have a glitch where the water at the bottom of this mission simply doesn't work, cheesing the mission completely. | ||
| + | <!--will elaborate more later--> | ||
<br clear="all"/> | <br clear="all"/> | ||
== Mission 43 - Puzzle At T'Mill == | == Mission 43 - Puzzle At T'Mill == | ||
[[file:Thumb43 - Puzzle At T'Mill.png|thumb|Puzzle At T'Mill]] | [[file:Thumb43 - Puzzle At T'Mill.png|thumb|Puzzle At T'Mill]] | ||
| + | The name of this mission really is true to its name; it is a bit of a puzzle. Find a way to knock down the enemy worms down with your limited weapons and taking advantage of the mines around the landscape. You have Girders and a few melee weapons to assist.<!--There could be more later, but I'll elaborate it later...--> | ||
<br clear="all"/> | <br clear="all"/> | ||
== Mission 44 - Revenge at Stonehedge == | == Mission 44 - Revenge at Stonehedge == | ||
[[file:Thumb44 - Revenge at Stonehedge.png|thumb|Revenge at Stonehedge]] | [[file:Thumb44 - Revenge at Stonehedge.png|thumb|Revenge at Stonehedge]] | ||
| + | Two of your worms stand near the left of the lower hill, inferior to the stonehedge at the peak of the hill. Their goal is to collect that vital crate at the right of the lower hill. | ||
| + | |||
| + | That stack of three crates at the middle is a trap, just useless Concrete Donkey crates that won't help you at all. Just use a Girder to go over them and avoid them. | ||
| + | |||
| + | If you get stuck, the Bronze stage will supply you with a utility crate containing a Jetpack that comes with 15 fuel. | ||
<br clear="all"/> | <br clear="all"/> | ||
== Mission 45 - Invertebrate Invaders == | == Mission 45 - Invertebrate Invaders == | ||
[[file:Thumb45 - Invertebrate Invaders.png|thumb|Invertebrate Invaders]] | [[file:Thumb45 - Invertebrate Invaders.png|thumb|Invertebrate Invaders]] | ||
| + | Hit the worms at the very top with your Bazooka. However, there will be a lot of obstacles in the way. Just keep spamming max power with your Bazooka while avoiding the raining mines from hitting either you or your vital worms. | ||
<br clear="all"/> | <br clear="all"/> | ||
== See also == | == See also == | ||
* [[Mission walkthrough (Worms Armageddon)]] | * [[Mission walkthrough (Worms Armageddon)]] | ||
| + | * [[Training Disciplines]] | ||
| + | * [[Time Attack]] | ||
== External links == | == External links == | ||
Latest revision as of 00:30, 13 November 2024
Disclaimer: The following textual guides are by far not the only ways of beating WWP's missions. They are only meant to help you out when you're out of ideas.
| |
This article has a to-do list: |
|
Contents
[hide]- 1 Mission 1 - Good Ship Armageddon
- 2 Mission 2 - Doo Wop
- 3 Mission 3 - Jumble Sail
- 4 Mission 4 - Shell Shock
- 5 Mission 5 - It's Raining Mines, Hallelujah
- 6 Mission 6 - Take Out The Trash
- 7 Mission 7 - Missile Base
- 8 Mission 8 - Woodland
- 9 Mission 9 - Jumpjet Defense
- 10 Mission 10 - Operation Alcatraz
- 11 Mission 11 - Apple Of Your Eye
- 12 Mission 12 - Fruit Bastilles
- 13 Mission 13 - Stairway to Armageddon
- 14 Mission 14 - Rainforest Ruckus
- 15 Mission 15 - Castle Hassle
- 16 Mission 16 - Bookworm
- 17 Mission 17 - Parachute Problems
- 18 Mission 18 - Pole To Pole
- 19 Mission 19 - Island Antics
- 20 Mission 20 - Berlin Boss
- 21 Mission 21 - Windymill On High
- 22 Mission 22 - Bunged Up
- 23 Mission 23 - Steeple Jack
- 24 Mission 24 - Radical Rescue
- 25 Mission 25 - Roping With Dinosaurs
- 26 Mission 26 - Rescue Me
- 27 Mission 27 - Jegg Central
- 28 Mission 28 - Chase The Ace
- 29 Mission 29 - Rule The Rooster
- 30 Mission 30 - Super Tricky Sheep
- 31 Mission 31 - Down On The Farm
- 32 Mission 32 - Icy Encounter
- 33 Mission 33 - Have No Fear, Old Dear
- 34 Mission 34 - Back And Forth
- 35 Mission 35 - Beachside Juggler
- 36 Mission 36 - End Of The Line
- 37 Mission 37 - Take'em Down
- 38 Mission 38 - Pie Eating Piper
- 39 Mission 39 - Plane Crazy
- 40 Mission 40 - All Aboard
- 41 Mission 41 - Bungee Fun
- 42 Mission 42 - Hindenburger
- 43 Mission 43 - Puzzle At T'Mill
- 44 Mission 44 - Revenge at Stonehedge
- 45 Mission 45 - Invertebrate Invaders
- 46 See also
- 47 External links
Mission 1 - Good Ship Armageddon
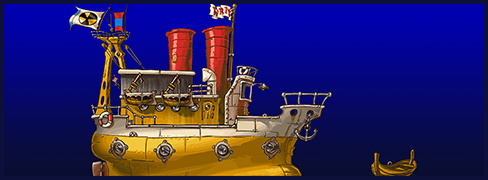
Your aim is to collect the vital crate at the top of the ship. Use the two girders to get up from the rowboat. Afterwards, use your Jetpack to lift yourself up above the ship's flag. Don't worry if you can't immediately jetpack to the vital crate; the crate nearby the vital crate contains a Teleport.
On the Silver attempt and below, the game will supply you with a free Low Gravity crate on the boat so you can jump off the boat more efficiently from your girders.
Mission 2 - Doo Wop
Drill holes with your Pneumatic Drill to reach the bottom and kill that enemy worm. You will need to conserve your limited Pneumatic Drills by digging the right holes. Some mines are present to allow you to break more of the terrain, but try to dodge the explosions if possible. If you reach the bottom platform, you will find a Baseball Bat, but you can still kill the enemy worm with your Pneumatic Drill.
Mission 3 - Jumble Sail
The first deathmatch-style mission. You will want to focus on knocking the first closest enemy worm to the water before using the rest of your weapons to destroy the other worms on the left ship. Your Jetpack may be helpful to get yourself to the left ship.
Mission 4 - Shell Shock
This mission is much different from a typical beat-the-enemy mission; health crates stock up "ammo" for the ship that your worm is riding upon. The intended solution for this mission is to collect a certain number of health crates, drop to the seat of the ship, and the mines will shoot at the enemy worms like a cannon. The girder provided will provide some protection against the shock of the mines.
You could simply use the knockback of the mines to send you to the island and then shove yourself down slopes to knock enemy worms downhill, if that's what is preferred. It's quicker but more risky and skillful to perform. You won't lose this mission if your worm is lost, only if there are still enemy worms alive.
Mission 5 - It's Raining Mines, Hallelujah
- Note: the name of this mission is probably a reference to the song It's Raining Men by The Weather Girls (see References to other media).
Your worm must use the Jetpack to cross raining mines multiple times, starting with grabbing the crate for the 2x Mines, then going the opposite side of the lollipops to drop a Mine at an enemy worm, and dropping a Mine on the other enemy worm, and then fly to safety. Your Jetpack has 100 units of fuel, meaning you won't need to worry too much about efficient usage of it, but you still need to avoid spending too long in the air. You can take your worm on a break between flights by landing on a safe location before continuing the next flight.
Mission 6 - Take Out The Trash
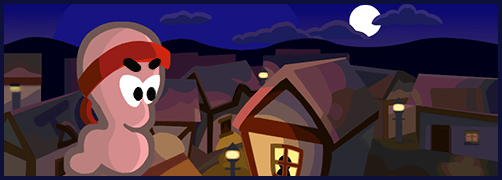
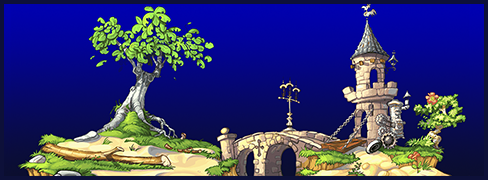
Use a girder to get up between the first building and the tall left building. Some mines will rain down from above after the end of the opponent's turn, between the two tall buildings. You will need to be careful with placing the next girders; try spacing the girders to avoid the mines falling on them. Use your Low Gravity once you reached the tall right building, and quickly run and jump to the bottom while your Low Gravity is active. Collect that vital crate, which contains a Patsy's Magic Bullet, and aim at the middle of the three enemy worms.
Mission 7 - Missile Base
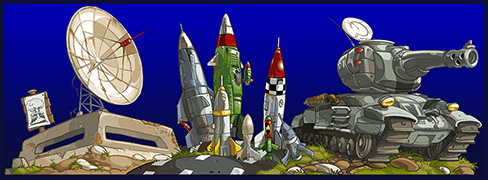
Use your Blowtorches to traverse through the terrain. Be mindful of how you use your Blowtorches and where you begin and move your worm. Also mind that the opponent can throw Grenades at you; before ending each turn, retreat to the middle of a tunnel, where Grenades won't be so useful. You also have some Girders and Bungees in your inventory.
If you get stuck, the Silver attempts and below will offer you an extra crate containing 1 extra Blowtorch.
Mission 8 - Woodland
Your aim is to collect the vital crate at the very right of the landscape. With a limited amount of mobility tools and "shoveling" weapons, traverse through the cliffs without your enemy picking off your health points. Your enemies will be loaded with Handguns and cannot move themselves. In this mission, Jetpacks only have 10 units of fuel.
On the first turn, you will need to use your Girder to secure the utility crate that would otherwise be dropped in the water; it contains two Jetpacks with low fuel. The first Jetpack should be enough for you to lift yourself up to the protruding left cliff. There are multiple solutions to get past the rest of the cliffs. For instance, the Girder can be used to get yourself up the highest cliff, and your Blowtorches will allow you to get through the landscape.
Mission 9 - Jumpjet Defense
Be careful when using your Jetpack to avoid the activated Armageddon to kill the enemy worm. Anticipate where the meteors of the Armageddon will aim. You have 200 fuel for your Jetpack in this mission. You can protect yourself somewhat by hiding underneath the aircraft.
Another way to complete the mission is to use your Jetpack as high as possible, enough to avoid the showering Armageddon meteors completely, but watch out for where you land after the Armageddon ends!
Mission 10 - Operation Alcatraz
Collect the vital crate behind that prison building with your utility tools. You have a generous selection of utility tools, including Low Gravity and Jetpack (via the utility crate on the island), plus Parachutes, Bungees, Blowtorches. You also have a few directly offensive weapons to dispatch the enemy if you wish.
The hardest part of this mission actually is to perform jumps correctly with your Low Gravity in use. To correctly jump over the boat with your two backflips, the first backflip should reach the leaf of the boat, and don't be afraid to stay close to the edge afterwards to make the second backflip up to the mast. You will need to find a way to get across to the island with your respectable amount of weapons available. Destroying the enemies with direct line of sight before reaching for that vital crate may be useful if you cannot complete the manoeuver to that vital crate after your second turn. Another hard part of the mission is efficiently using the Jetpack's measly 15 fuel to safely get up to or above the peak of the building.
If you get stuck, the Silver attempt and below may offer you an extra crate on top of the boat, containing 1 Bazooka.
Mission 11 - Apple Of Your Eye
This mission is all about timing your jumps across the apples to avoid getting struck by the mines, and quickly strike the enemy with a Fire Punch before the 60 seconds run out. Your respectable 100 health gives you room for up to 3 mine explosions. At the Bronze stage, you will be provided with a Fast Walk to help you quickly run to the next apples.
Mission 12 - Fruit Bastilles
Hurry yourself with the Jetpack (which has a measly 6 units of fuel in this mission) to get up the cherry blossom tree, and use your Low Gravity to jump across the two castles. There is a target that you can destroy with any of your weapons to deploy a crate containing a Fire Punch. The crate will float down towards the mines at the grass, so you would need a Girder in advance to stop its fall. Bungee yourself down the right tree and use your available offensive weapon to send the enemy into the water. Spend as few turns as possible, before the enemy unlocks new weapons to attack you or your helpless vital worm. Note that in this mission, you can perform multiple weapons on your turn, allowing you to use a Girder and a Baseball Bat on the same turn to secure the Fire Punch crate. Still, you only have 30 seconds per turn.
Mission 13 - Stairway to Armageddon
- Note: the name of this mission is probably a reference to the song Stairway to Heaven by Led Zeppelin (see References to other media).
Shotgun the targets to help get up to the top, building "stairs" of the staircases. As you make way up the ladders, remember to conserve your Shotguns. Note that you can destroy up to two adjacent targets with each Shotgun shot; aim between the two targets to achieve this. The second and third "staircases" contain mines that you'd need to dispatch with your Shotgun. The second "staircase" just involves removing one target to push down the layers of the third column. The third "staircase" requires you to knock back the mine with the destruction of a target; aim at the mine such that it falls off the stacks of targets. You can afford to use the Skip Go if you're running out of time, but be sure to use all two shots from each Shotgun first or else you'll waste the free last shots.
Creating the "stairs" with your limited Shotguns is not your only problem. As you get up the "stairs", you will need to jump over the targets competently. The first leap to the stairs requires at least 1 target tall to jump over, you can jump up to just over 2 targets tall with a backflip, and you must never get within range of the mines (which all have 1 second fuse time) or else your puny 5 health will become nothing. Fortunately, you are still able to perform close-range Shotgun shots to simultaneously hit two targets without blasting your worm.
If you get stuck on this level, the game may offer you a crate with a Laser Sight, and if you are really stuck, the game may provide you a crate with an extra 2 Shotguns. These are the anti-milestones for the Silver and Bronze stages, respectively.
Mission 14 - Rainforest Ruckus
In this mission, your aim is to use the Ninja Rope to move around the landscape and launch your limited weapons at your enemies as quickly as possible within your available turns. Luckily, in this mission, using a weapon will not trigger retreat time; you can spam weapons at your leisure. Unlike you, your enemy will fire slowly, cannot move, but they can choose any of their worms to start blasting you. Your worm has 150 health. Each team has 35 seconds per turn.
You start with 8 Grenades, 8 Cluster Bombs, 1 Girder, 6 Blowtorches, and, most importantly, infinite Ninja Ropes. There is also a Shotgun crate near the tail of the left monkey, but that crate is way beyond your normal reach without getting into a vulnerable position.
- For the Ninja Rope, you must learn at least the technique of performing mid-air roping and the jump-and-rope tactic to adequately get through this mission, but it is recommended you additionally learn how to perfect the upwards roping technique.
- It is best to use those Grenades and Cluster Bombs to carpet-bomb from your Ninja Rope to your nearby enemies.
- Use your Blowtorches to get out of tunnels and also hide somewhat from your enemy.
- The Girder is completely optional, but you can use this to gain leverage to your grenade weapons or bridge the landscape for your worm.
The enemy is a CPU 5, meaning they have the best AI-programmed accuracy in the game, and they have full access to unlimited supplies of Bazookas, Grenades, Shotguns, and Air Strikes (unlocked after their 3rd turn). There are a total of three enemy worms: one on opposite sides, with 150 health each, and another worm at the top with only a measly 50 health. You can try to outsmart their AI by standing on any of the enemy worms' heads, or position in a location where no enemy worm is able to get a clear shot out of you. You could try to stall their turns and hope for them to make an unlucky shot that forfeits their turn or gives you a navigational advantage, but bear in mind that the match time is only about 15 minutes before Sudden Death begins, and by Sudden Death the mission would become a loss.
To begin, you will need to Blowtorch out of any side to then Ninja Rope your way around the landscape as you mercilessly target your exposed enemies with your weapons. You will need to show proficiency with the Ninja Rope to get around the landscape, rather than wasting your weapons to just plow through the landscape. Learning how to retreat from your rope after dropping weapons is an important skill, allowing you to perform a tactic involving carpet-bombing enemy worms with your Grenades or Cluster Bombs; it takes less time to carpet-bomb than to manually throw them. If you're struggling to get a good act of carpet-bombing from your Ninja Rope, try standing right on top of the enemy worm's head, stick the rope diagonally at 45-degrees, then carpet-bomb up to a certain number of grenade weapons with max fuse time, and finally rope off before the explosions end up hurting you.
It is possible to complete this mission in one single turn. However, most players will have difficulty roping around the entire landscape within the 35 seconds per turn and still kill all three enemy worms; if you're having trouble, always aim for the most exposed worm in your turn and ensure that worm is dead by the end of your turn.
If you're stuck on this mission, the Bronze stage will provide a nearby Health Crate worth +50 health.
Mission 15 - Castle Hassle
You must reach towards the end of the landscape with your utilities to acquire the almighty Armageddon and kill every single enemy. As the Armageddon has an element of RNG, a single Armageddon still may allow one or more enemies to survive; to be safe, kill the first enemy worm with your Fire Punch. Your enemies are immobile but armed with weapons, so find a location that will protect you between turns. Take advantage of your Jetpack, Low Gravities, and Girders to get around the terrain. You will also be supplied with a Bungee and Ninja Rope (plus one more Ninja Rope with another crate). Use your utilities to move around the second castle and then hide beneath it with your Blowtorches. Your worm actually doesn’t have to survive in order to win this mission, so feel free to use all of your Blowtorches at your will; just use your Armageddon to kill every enemy worm on screen and you've won the mission.
If you get stuck, the Silver and below attempts may offer you a nearby crate containing an extra Ninja Rope.
Mission 16 - Bookworm
Quickly navigate your way across the books so you can use your Prod to toss your enemy into the stacks of mines. But before then, watch out for the time. You will be supplied several Fast Walks to assist your otherwise sluggish movement speed. Your girders will be useful for protecting you from the enemy worm's Grenades.
If you get stuck, the Silver attempts and below will supply a utility crate containing a Jetpack with a measly 10 fuel.
Mission 17 - Parachute Problems
Quickly parachute across the platform to collect the crates as you travel to the small platform to smash that target with your Battle Axe within 30 seconds. Your first jump will be very important to begin the parachuting journey. Don't waste time thinking about how to begin, because you only have 30 seconds per turn. If you have to, you can use a Skip Go to hope for a more favorable wind direction, and also reset your turn time.
Remember that you can slightly adjust your parachute movements with the arrow keys.
- Up: Slows down the fall
- Down: Speeds up the fall
- Left: Push slightly to the left
- Right: Push slightly to the right
Mission 18 - Pole To Pole
Much like Apple Of Your Eye, this is a mission that relies on timing your jumps to avoid the moving mines. However, the platforms are straight and mines bounce upwards from the bottom. You got a generous 100 seconds to reach the final platform to kill the enemy worm with the crate containing a Fire Punch, but you'll need to be extra prepared to dodge all of the mines. As your worm only has 10 health, a single mine explosion is enough to lose the mission.
As a tip, jump to the next platform after the mines fall down, and time a backflip to dodge mines on your current platform.
Mission 19 - Island Antics
Not very straightforward of a mission, and also the first mission where you must destroy a vital crate to win the mission. The order for completing this mission roughly goes like this:
- Jetpack your first worm to the crate near the frontfacing moai. It contains a Longbow. Skip turn. The enemy worm will also skip turn on their first turn.
- Your second worm will try to dispatch the instant-timed mine on the trap. Use the Longbow. Optionally, you have the Laser Sight to allow you to accurately target. If you intend to use your second worm, make sure that worm is out of its original spot, or else Step 5 will be messed up. Enemy worm will skip turn once again.
- Your first worm will use a Low Gravity to backflip to the frontfacing moai, then backflip to the large palm tree, jump off the palm tree by jumping off the oil drum to avoid the two mines, and try to collect the Utility Crate nearby. The Utility Crate contains a Low Gravity. You must collect that crate in order to summon the rest of the crates. If a mine is in the way, dispatch the mine with your Handgun so you can collect a Utility Crate safely. Enemy worm should again just skip turn.
- If your second worm is still not dead, skip turn. Enemy worm should again just skip turn.
- Your first worm should collect the final crates towards the left with the aid of your currently available utility weapons. If you manage to collect the final crate leftwards of the island, you will need to safely destroy the vital crate with any of your worms. Do not attempt to collect the vital crate.
Mission 20 - Berlin Boss
Navigate the terrain and get to that vulnerable enemy vital worm at the right side and push it to inevitable doom, right into the pit of mines. Enemy worms are armed with Grenades, and you should use your Girders to protect you and get up tall areas. A single Shotgun, some Blowtorches, and one 10-fuel Jetpack will also be provided in your inventory. Enemy worms each have an effective line of sight to hurl their Grenades.
Mission 21 - Windymill On High
Very few damaging weapons are at your arsenal, and you must travel across the deadly landscape of windmills and mines safely within just 70 seconds per turn. You can still allow for a second turn, but the only sensible way to kill the enemy worm is to just jump down to the hill, pushing your worm and the enemy worm down the hill, drowning them both. The game even explicitly states for this mission: There IS honour in death.
Mission 22 - Bunged Up
Use your rope to collect crates, which will additionally push enemy worms out of the "taps" so you can use your now-collected Bazookas (9 per crate) to kill them all. It's more recommended to use the splash damage of the Bazooka to knock multiple enemy worms into the real water, saving you some time and ammo to dispatch the left and right enemy worms. Shooting a weapon won't end your turn, but with just 30 seconds per turn, you gotta be quick with your roping and shooting.
If you end your turn, the enemy team will play. Note that the enemy for this mission cannot move, the land is indestructible, and can only use Air Strikes. Hiding underneath the taps is a good choice.
Mission 23 - Steeple Jack
There are two very low health enemy worms at the tall tower, one with just 1 HP and the other with 5 HP. With only two of your worms, they must somehow get to the other side and kill them both with no explosive weapons, firearms, or strikes in your inventory. In fact, the only things in your inventory is a Low Gravity, some Girders, and a Baseball Bat. There is a mine near the enemy that will be able to kill both of them with the splash damage of that mine and the 1 HP enemy worm's gravestone explosion. Batting one of your fellow worms as a projectile is one of many ways to trigger that mine.
Mission 24 - Radical Rescue
Jetpack to each of the crates safely while flying relatively efficiently. With 30 seconds on the clock and 150 fuel on your Jetpack, there are a total of 12 required utility crates (13 if including the final Double Damage utility crate) you must collect before you get a real weapon. You will not get extra fuel from collecting each crate, unlike Jetpack Training. If you collect enough of the utility crates, of which all but the last crate contains just useless Crate Spies, you will be presented with a weapon crate, containing a Holy Hand Grenade that you should dump near your enemy and fly off safely.
Mission 25 - Roping With Dinosaurs
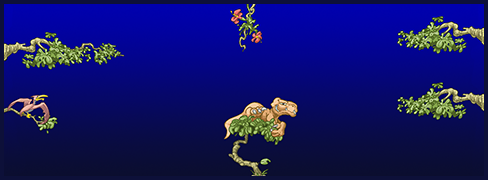
Unlike your enemy worms, your only worm is immobile outside of a single Jetpack and the Ninja Rope that must be obtained via the first crate. Every other crate you collect from other islands of this cavern will contain Bazookas. You must be confident at roping horizontal and vertical distances in order to succeed this mission. You could also try launching Bazookas from your Ninja Rope if you're really confident about your rope skills. Kill every enemy worm, preferably by dunking them into the water, and you will win the mission. Enemy worms will be armed with Bazookas. The land is indestructible in this mission, so you can be assured that you always can end your turn unharmed.
Mission 26 - Rescue Me
Two helpless vital worms of your team are stuck in an endless supply of mines that bounce them up and down. The goal is simple: slow down the descent of your poor vital worms with your Low Gravity, collect each of the Girder crates and intercept each of your vital worms with a Girder each, and show the enemy worm on the opposite side who is boss with the Prod. You will need quick reflexes for this mission.
Mission 27 - Jegg Central
Depending on your version of the game, Jegg Central is completed in distinct ways. On the PC version, you will use your Longbow to create massive arrow bridges across the terrain and aim at targets, whereas on the PlayStation version you use Girders to bridge across and Shotguns to aim at targets. Either way, aim accurately at the targets from different points of the landscape, and then finally collect the very last crate before the timer runs out.
You only have 90 seconds to finish this mission. There is a nearby Fast Walk utility crate that you can use to increase running speed. In the PC version, you do still have a single Girder to potentially make bridging a bit easier.
Mission 28 - Chase The Ace
Get to the vital crate with your Blowtorches, Girders, Parachute, and Jetpack. There's a lot of mines on the landscape that you must avoid. Only 30 seconds per turn, and using a damaging weapon will end your turn. The enemy is pretty lazy, always skipping its first few turns.
Mission 29 - Rule The Rooster
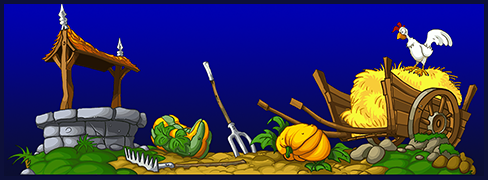
Beginning near the chicken, you must use your utility tools to get yourself to that leafy plant to kill the exposed enemy vital worm. You do have a Girder, Blowtorches, and Jetpack to allow to reach the leafy plant. Once you're in position, one downwards Shotgun shot should do the trick to kill that feeble worm.
Mission 30 - Super Tricky Sheep
The intended solution is to keep using Super Sheep to collect crates while avoiding your helpless vital worms; collecting the crates with your Super Sheep will eventually give you Battle Axes that you can use to slash the health of your nearby enemy worms.
As your worm cannot move itself, you have to rely on your Super Sheep to do all the dirty work. You must be proficient with controlling your Super Sheep to win this mission. Also watch out for the automatic timer on the Super Sheep so you don't accidentally mid-air explode your vital worms. Your enemy worms will always skip their turns, so don't worry about what the enemy does, just your Super Sheep skills. If your worm dies, you lose because your vital worms will surrender, and likewise occurs if either of your vital worms die.
The alternate, less time-consuming but more risky method is to use your Super Sheep to explode midair to kill enemy worms but not enough damage to kill your worm.
Mission 31 - Down On The Farm
Pop the target so you can collect two Jetpacks, allowing you to then dispatch exposed enemy vital worms by pushing them into densely packed mines, or knock those mines to the worms. Be careful not to be the target of all those mines yourself! Your weapons alone will not be able to deal enough damage to get rid of all of them.
Mission 32 - Icy Encounter
A very typical deathmatch-style mission. Aside from getting your two worms upwards with Girders, digging through stumps with your Blowtorches, and collecting every crate you see to maximize your collection of offensive weaponry, the end goal is that you must eliminate your enemy. Take care not to get too exposed to your enemies at the end of each turn! Your enemies cannot move, but you can, and you also got more than enough Girders to be usable as protection. Your worms both have 100 health each.
Mission 33 - Have No Fear, Old Dear
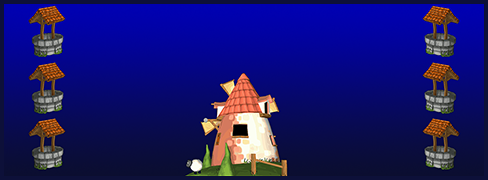
Using your Bazooka, kill all enemy worms hidden inside the indestructible wells, while avoiding the falling old women, all within 100 seconds of a single turn. Like the old women in Uzi Training, hitting an old woman loses time; damaging her makes her pop and removes 5 seconds from your remaining time. You cannot move, only standing on top of the windmill. The lack of wind means you only need to rely on the trajectory of each bazooka shot without accounting for wind direction.
Mission 34 - Back And Forth
Toss your worm around the landscape back and forth to the left and right sides at least three times with your Ninja Rope, so you can stock enough Shotguns to go destroy that vital crate. The upwards Ninja Rope technique is a must for this mission, or else you'll never be able to reach the ordinary crates without getting brutalised by the instant-fuse mines. To destroy that vital crate, shoot four times into the thinnest region of the thick giraffe neck, then shoot a fifth time with your third Shotgun and finally use that sixth shot onto that vital crate.
Mission 35 - Beachside Juggler
Get around the landscape so you can use Prod on your enemy worm and knock back that worm with your Minigun. Combined with the Low Gravity makes for a neat combination.
Mission 36 - End Of The Line
Many crates, many mines, few utility tools and "shoveling" weapons, this mission will test your skills to traverse the landscape safely. You have two worms, where one of them will go fetch that vital crate.
Mission 37 - Take'em Down
Collect crates on small floating marbles with your Ninja Rope, destroying targets in the process with instant-fuse mines, and sinking the enemy vital worm lower and lower until there's nothing left. Be careful not to rope for too long, or else time will be up, and the enemy has many angles at which they could shoot you down with no trouble. The land is indestructible, your enemies only have firearms, and they definitely won’t be able to snipe you off any region outside their direct line of sight.
Mission 38 - Pie Eating Piper
Pick off the target on the donkey's left ear with your Prod and jump to the donkey's right ear, automatically create health crates, repeat the process, until the crates gets close to the mines. Then you use a Ninja Rope to safely go down the donkey without touching the health crates and use Blowtorch to cut the legs of the donkey. The enemy worm should be foolish enough to just keep collecting health crates mindlessly till turn time is over. Then with that opportunity opening up, use Prod on that enemy worm and that worm will be sent to a crowd of mines.
Mission 39 - Plane Crazy
Get rid of the enemy worm at the very end of the landscape. To do this, you must go through the landscape by your assortment of Blowtorches, Girders, and Fire Punch to get closer to the enemy worm. There is a Prod crate that you can use to push the enemy worm into the water. The enemy worm always skips turns. You could use your Grenade to plop the enemy worm into the water, but beware that you only have 1 Grenade.
If you are skilled enough with the Grenade, you could get a perfect shot to beat the worm in one turn. You'll need to find a good location to throw the Grenade, however, and your starting location won't suffice. A Girder could set you up in a good position to throw that perfect Grenade. For speedrunning, it takes a minimum of two turns to win this mission.
If you are stuck, the game may supply you with a utility crate containing a Jetpack. This Jetpack has only 15 fuel.
Mission 40 - All Aboard
Plays almost like Mission 9 but you are now fully exposed. Now you must rely on dodging the meteors successfully. You still have 200 fuel for your Jetpack, fortunately.
Like Mission 9, you can always just Jetpack your way above the Armageddon completely and swiftly find a landing spot after the Armageddon ends.
Mission 41 - Bungee Fun
The thumbnail looks like nothing, but in reality, your worm is standing on a tiny platform ready to bungee down and eventually get rid of the two enemy worms on the other tiny platforms opposite your platform. Swing your bungee to the locations of the incoming crates. Time the swings and aim your worm. Once you get the last few crates, you will gain access to two Homing Missiles; just aim directly at a worm and drop the missile, twice. You do have a girder to save yourself after collecting every other crate, but that is optional. You have only 60 seconds in this mission.
Mission 42 - Hindenburger
Navigation above the water with a short ceiling below can be difficult. Jetpack right near the hidden enemy worm and Fire Punch deploy from your Jetpack. Please do not mind the fall damage you take afterwards; as the enemy worm only has 30 health and your worms have far more health, just a single hit from your Fire Punch wins.
Note that some patches of the game have a glitch where the water at the bottom of this mission simply doesn't work, cheesing the mission completely.
Mission 43 - Puzzle At T'Mill
The name of this mission really is true to its name; it is a bit of a puzzle. Find a way to knock down the enemy worms down with your limited weapons and taking advantage of the mines around the landscape. You have Girders and a few melee weapons to assist.
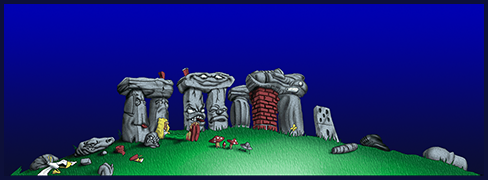
Mission 44 - Revenge at Stonehedge
Two of your worms stand near the left of the lower hill, inferior to the stonehedge at the peak of the hill. Their goal is to collect that vital crate at the right of the lower hill.
That stack of three crates at the middle is a trap, just useless Concrete Donkey crates that won't help you at all. Just use a Girder to go over them and avoid them.
If you get stuck, the Bronze stage will supply you with a utility crate containing a Jetpack that comes with 15 fuel.
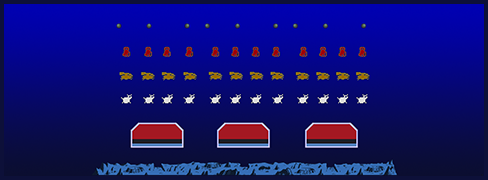
Mission 45 - Invertebrate Invaders
Hit the worms at the very top with your Bazooka. However, there will be a lot of obstacles in the way. Just keep spamming max power with your Bazooka while avoiding the raining mines from hitting either you or your vital worms.
See also
External links
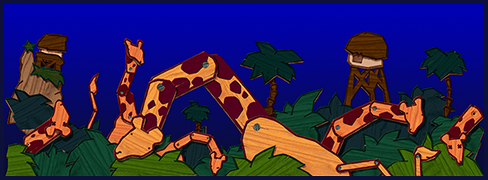
There is a page on speedrun.com dedicated to leaderboards for unassisted Worms World Party speedrunning categories, including the "All Missions" category. To qualify for placement in that category, players must follow the posted rules visible when clicking "View Rules" on that page.
