Difference between revisions of "Alt-F4"
From Worms Knowledge Base
m (That sounds nicer and truer.) |
(→Competitive events: Organization.) |
||
| (27 intermediate revisions by 4 users not shown) | |||
| Line 2: | Line 2: | ||
{{Game setup|file=Alt-F4.wsc|scheme=Alt-F4|map=Complex but open random island maps|worms=6 per player (1v1), 3 per player (2v2)}} | {{Game setup|file=Alt-F4.wsc|scheme=Alt-F4|map=Complex but open random island maps|worms=6 per player (1v1), 3 per player (2v2)}} | ||
[[Image:Alt-F4.png|thumb|Alt-F4 is a competitive ground scheme where your worms are limited to only using weapons from the F-key row they are named after.]] | [[Image:Alt-F4.png|thumb|Alt-F4 is a competitive ground scheme where your worms are limited to only using weapons from the F-key row they are named after.]] | ||
| − | {{ReplayBox|2020-05- | + | {{ReplayBox|2020-05-26_00.16.58_Alt-F4_R4_NogardDerNaerok_ShyGuy.WAgame|An interesting round|of Alt-F4 between KRD and ShyGuy}} |
| − | {{ReplayBox|2020-05- | + | {{ReplayBox|2020-05-22_20.10.15_Alt-F4_R3_NogardDerNaerok_ShyGuy.WAgame|Another rather exciting|round of Alt-F4 between the two}} |
| − | [[Alt-F4]] is a highly strategic member of the F-key family of [[Schemes|schemes]], where worms are only allowed to use weapons that appear in the [[Weapons|weapon panel]] row that | + | [[Alt-F4]] is a highly strategic member of the F-key family of [[Schemes|schemes]], where worms are only allowed to use weapons that appear in the [[Weapons|weapon panel]] row that the worms are named after (F1, F5, F9, F12...) as well as, in the case of [[Alt-F4]], anything from the '''F8''' row, any utility from the '''Util.''' row, and [[Skip Go]]. Best of 3 matches are played on random island maps between six 150 HP worms a side, with turn order set to cycle between them randomly. After the 15 minute round timer runs out and [[Sudden Death|sudden death]] arrives, all worms are set to '''1 HP''', but water does not rise. Weapon powers in the scheme are set to the standard 3 stars, including the two [[Ninja Rope|Ninja Ropes]], giving them a single reshoot, but with rope knocking (and by extension [[Bungee]] knocking) disabled. |
Because the way in which individual rounds play out depends in large part on what worms (F-keys) appear on the battlefield, the scheme allows for an ever-evolving '''metagame''' to develop, even without any changes made to its scheme file. Through this mechanism, it is the players, via their choices, who in the long run decide which F-keys are expected to see more play because they just seem individually strong, which ones might only be niche inclusions intended to surprise opponents, which ones warrant going out of your way to kill off early, which ones could potentially be more dangerous in the hands of specific players, or as part of specific team compositions, or on specific maps and so on. | Because the way in which individual rounds play out depends in large part on what worms (F-keys) appear on the battlefield, the scheme allows for an ever-evolving '''metagame''' to develop, even without any changes made to its scheme file. Through this mechanism, it is the players, via their choices, who in the long run decide which F-keys are expected to see more play because they just seem individually strong, which ones might only be niche inclusions intended to surprise opponents, which ones warrant going out of your way to kill off early, which ones could potentially be more dangerous in the hands of specific players, or as part of specific team compositions, or on specific maps and so on. | ||
| Line 14: | Line 14: | ||
**[[Skip Go]] is also allowed to be used by any worm. | **[[Skip Go]] is also allowed to be used by any worm. | ||
**[[Surrender]] is only allowed to be used by any worm in 1v1 matches, where it ends the round. | **[[Surrender]] is only allowed to be used by any worm in 1v1 matches, where it ends the round. | ||
| − | ** | + | **In case you accidentally use a weapon your worm is not allowed to use, the punishment for it is [[Skip Go|skipping go]] on your following turn, without moving or doing anything else with that worm. |
| + | **Unless otherwise agreed upon, using the basic letter-F-and-a-number worm name format is recommended. Stranger formats (for example "F-0010" for F2 in binary, "Fickle Three" for F3, etc.) have been used too, but clarity and competitive fairness can suffer as a result. | ||
| − | *'''Each player is only allowed one of | + | *'''Each player is only allowed at most one of any particular F-key on their team''' (i.e. no duplicates) |
| − | **Although an interesting alternative way of playing allows two of | + | **Although an interesting alternative way of playing allows at most two of any particular F-key per side/alliance. Note however that you won't be able to call two worms on a team the exact same name, so doing something like F9 and F9* is then required, or splitting the F9 worms between two players in 2v2 matches (as you would have to under the standard rule set). |
| + | |||
| + | The following "rules" are enforced by the scheme file itself, as of [[Updates_(Worms_Armageddon)|Worms Armageddon 3.8]]: | ||
*'''No [[Ninja Rope|rope]] knocking (includes [[Bungee]] knocks)''' | *'''No [[Ninja Rope|rope]] knocking (includes [[Bungee]] knocks)''' | ||
| Line 31: | Line 34: | ||
== Strategy and Metagame == | == Strategy and Metagame == | ||
| + | [[Image:Epic_Old_Woman_by_Kayz_(Alt-F4).gif|frame|right|An epic Old Woman plop.]] | ||
| + | [[Image:Epic_Dynamite_by_Kayz_(Alt-F4).gif|frame|right|An epic Dynamite plop.]] | ||
On a fundamental level, offering a rough outline of what to expect from [[Alt-F4]] and some guidance on constructing your team, the F-keys appear to fall into a few categories that are distinct both in what they theoretically offer to a team composition, and in terms of how including them usually tends to play out in practice. | On a fundamental level, offering a rough outline of what to expect from [[Alt-F4]] and some guidance on constructing your team, the F-keys appear to fall into a few categories that are distinct both in what they theoretically offer to a team composition, and in terms of how including them usually tends to play out in practice. | ||
| Line 42: | Line 47: | ||
*'''F2''' with unlimited [[Grenade]] and 2x [[Battle Axe]] | *'''F2''' with unlimited [[Grenade]] and 2x [[Battle Axe]] | ||
*'''F3''' with unlimited [[Shotgun]], [[Uzi]], [[Handgun]], [[Longbow]] and 1x [[Minigun]] | *'''F3''' with unlimited [[Shotgun]], [[Uzi]], [[Handgun]], [[Longbow]] and 1x [[Minigun]] | ||
| − | *'''F5''' with | + | *'''F5''' with unlimited [[Mine]], [[Mole Bomb]] and 1x [[Dynamite]] |
'''Late game strategies and finishers''' that allow you to intentionally aim to take rounds late: | '''Late game strategies and finishers''' that allow you to intentionally aim to take rounds late: | ||
| Line 53: | Line 58: | ||
*'''F12''' with unlimited [[Worm Select]] and 1x [[Freeze]] | *'''F12''' with unlimited [[Worm Select]] and 1x [[Freeze]] | ||
| − | Sometimes these categories end up overlapping slightly as well, depending on the details of the situation the worms find themselves in. But figuring out a team composition that is synergistic, not awkward in some crippling way and which simply works for you is by design a large part of becoming better at [[Alt-F4]]; experimentation, adaptability and experience thus all play an important role. | + | Sometimes these categories end up overlapping slightly as well, depending on the details of the situation the worms find themselves in. But figuring out a team composition that is synergistic, not awkward in some crippling way and which simply works for you personally is by design a large part of becoming better at [[Alt-F4]]; experimentation, adaptability and experience thus all play an important role. For an approximate idea of how powerful each individual F-key may be, if that's something that you think might be useful, you can have a look at some examples of totally subjective F-key tier lists below, closer to the bottom of this article in the Tier Lists section. |
=== Synergies and Anti-Synergies === | === Synergies and Anti-Synergies === | ||
| Line 61: | Line 66: | ||
*The '''F1''' and '''F10''' worms are both somewhat late game oriented. Bazookas are, from a distance, good against low health poisoned worms as well as at keeping Petrol Bomb fire alive. Petrol Bombs are themselves good at prolonging rounds and, via blocking, keeping poisoned worms stuck with little to do. Even when their synergy doesn't come together, they remain individually strong during 1 HP sudden death. | *The '''F1''' and '''F10''' worms are both somewhat late game oriented. Bazookas are, from a distance, good against low health poisoned worms as well as at keeping Petrol Bomb fire alive. Petrol Bombs are themselves good at prolonging rounds and, via blocking, keeping poisoned worms stuck with little to do. Even when their synergy doesn't come together, they remain individually strong during 1 HP sudden death. | ||
| − | *Worms like '''F4''', '''F5''', '''F7''', '''F9''', '''F10''' and '''F11''' who can inflict heavy damage against (or score outright full HP kills on) enemies in specific positions obviously benefit greatly from having movement utilities ('''F8''' and '''Util.''' rows) at their disposal. Too many of these worms going for too many | + | *Worms like '''F4''', '''F5''', '''F7''', '''F9''', '''F10''' and '''F11''' who can inflict heavy damage against (or score outright full HP kills on) enemies in specific positions and arrangements obviously benefit greatly from having movement utilities ('''F8''' and '''Util.''' rows) at their disposal. Too many of these worms going for too many early power moves can leave you stranded later on, however. |
| − | *As a worm that does nothing by itself, '''F12''' is a synergy machine, although likely at its strongest coupled with aggressive early game worms like '''F7''', '''F9''' and '''F11'''. '''F4''' with its Kamikaze and '''F5''' with the Dynamite are contenders as well. | + | *As a worm that does nothing by itself, '''F12''' is a synergy machine, although likely at its strongest coupled with aggressive early game worms like '''F7''', '''F9''' and '''F11'''. '''F4''' with its Kamikaze and '''F5''' with the Dynamite are strong contenders as well. |
| − | *When playing 2v2 or | + | *When playing 2v2 or following an alternate rule set that allows more than at most one of the same F-key per player, beware of using two of worms like '''F3''', '''F5''', '''F6''' and '''F11''', who all come with a very limited supply of their best (or all) weapons. Because inventories are shared, the anti-synergy of having more than one of these may end up hindering you. |
=== Potential Counters === | === Potential Counters === | ||
| − | *Late game, defensively oriented compositions running an '''F10''' worm should be pretty good against aggressive ones that try to finish rounds early, or risk their | + | *Late game, defensively oriented compositions running an '''F10''' worm should be pretty good against aggressive ones that try to finish rounds early, or risk their '''F12''' worm feeling increasingly useless as it watches the other F-keys slowly die to poison ticks, while itself getting ignored and intentionally left for last, at which point it becomes almost entirely useless and a waste of 150 HP. This theory does however require further practical testing. |
=== Tips and Tricks === | === Tips and Tricks === | ||
| − | + | [[Image:TA Minigun as a bat Alt-F4.gif|thumb|left|Deadcode's tool-assisted demonstration of a Minigun turning into a Baseball Bat]] | |
| + | [[Image:Uzi kill Alt-F4.gif|thumb|right|An outstanding Uzi double kill with the F3 worm]] | ||
| + | [[Image:Jump mine knock Alt-F4.gif|thumb|right|The F5 worm jump knocking a mine to drown a worm below]] | ||
*The scheme comes with a generous hotseat timer of 10 seconds. Don't forget to make use of it to plan out your turns in advance! | *The scheme comes with a generous hotseat timer of 10 seconds. Don't forget to make use of it to plan out your turns in advance! | ||
| − | *If you're ever unsure | + | *If you're ever unsure which F-key worm you're currently controlling, tap the delete key four times; that should bring its name tag back down from the sky. Note though that this doesn't work while walking, and usually doesn't help during hotseat. |
| + | |||
| + | *Don't forget that Parachute and Bungee come in infinite supply and can be used by any worm. Not only does this significantly increase the offensive range of all F-keys, it can also mean the difference between having to use a limited movement utility or being able to conserve it for later. In the late game, combined with strong wind, securing high ground lets you cover large portions of the map with Parachute alone. | ||
| + | |||
| + | *Your Uzi and Minigun can turn into a Baseball Bat... sometimes. Have a look at [https://kingbird.myphotos.cc/2020-05-20%2006.24.12%20%7B9%20-%20Minigun%20%40%2013m18s%7D%202020-05-19%2004.03.51%20%5BAlt-F4%5D%20%5BR2%5D%20%40NogardDerNaerok%2C%20ShyGuy.WAgame this tool-assisted demonstration] at 13:18. | ||
| + | |||
| + | *Mines can be jumped against immediately after being placed, pushing them a significant distance away, especially from a height, onto unsuspecting worms below. It requires some dexterity, a sense of timing, and is often at least somewhat risky. But it's totally a thing that works out majestically sometimes. | ||
| + | *There's a pattern to how the random turn order works in this game. Figure it out or look it up to unlock the full potential of your F12 worm. | ||
== History == | == History == | ||
| + | |||
| + | The final adjustments made to the [[Alt-F4]] scheme file, before its author [[User:KoreanRedDragon|KRD]] was happy to begin playtesting it with others more seriously, likely happened on 30th April 2019. These changes included the F7 worm losing [[Girder]] but being upgraded to infinite [[Baseball Bat]] instead of the single one it had before, as well as the F12 worm having the (only very situationally useful) single [[Freeze]] (re)added to its arsenal, to go along [[Worm Select]] as its main tool. | ||
| + | |||
| + | The immediate precursor to and main reference in its design was a fellow member of the specialist/F-keys family of schemes, [[User:Goom|goom's]] [[Fkey Strike]], which at the time was a popular passtime among those frequenting the [[Worms on GameSurge|#worms IRC channel]]. Where that version of the concept focused more on approachability (fewer available weapons, of a lower and more equal damage potential) and fun (crates, bungee knocking, a very weak F7 worm that frequently evoked laughter and/or pity), [[Alt-F4]] was to set itself apart by being more competitively minded, with all weapons in it set to the standard 3 stars of power familiar to those used to popular ground schemes such as [[Elite]], [[Intermediate]] and [[Team17]]. Rules on team creation were somewhat simplified. The overall power level, explosiveness and variety of the available weapons were increased to help diversify individual F-keys, complicate the thinking about the team compositions they might work best in, facilitate more combo potential, and speed gameplay up. The F6 and F11 worms were made stronger but riskier to pick through the decision to allow them to run out of all five of the weapons available to them and become useless in rounds that fail to be won quickly. | ||
| + | |||
| + | At that point, testing began in earnest, with (most notably) [[User:ShyGuy|ShyGuy]] and others from [[Worms on GameSurge|#worms]] completing well over a hundred rounds between them over the next year or so. This helped [[User:KoreanRedDragon|KRD]] arrive at the conclusion that the scheme remained fun even when played primarily with the aim to win, that the F-keys in it were balanced well enough not to need further tweaking, and that some of them being or appearing weaker actually made things even more interesting when a player decided to include them as part of their strategy anyway. It was also at this stage that the first so called tier lists appeared, where players grouped the F-keys into tiers based on how good or bad they thought they were, in their experience. Then of course argued about it! | ||
| + | |||
| + | The only thing left to do then was to get started on this WKB article, thereby releasing the scheme into the wild, and watching to see if any leagues, cups, tournaments or streams end up happening that include it. | ||
=== Tier Lists === | === Tier Lists === | ||
| − | + | Some tier lists, to help keep track of what we have historically thought was good and not good: | |
2020-05-16: [http://krd.clansfx.co.uk/dump/bb5473b6b301f8993ff1db74a33c7503/Alt-F4%20Tierlist%20%5B2020-05-16%5D%20%5BKRD%5D.png KRD's initial Alt-F4 tier list] | 2020-05-16: [http://krd.clansfx.co.uk/dump/bb5473b6b301f8993ff1db74a33c7503/Alt-F4%20Tierlist%20%5B2020-05-16%5D%20%5BKRD%5D.png KRD's initial Alt-F4 tier list] | ||
2020-05-25: [http://krd.clansfx.co.uk/dump/276bab3e288c07f91ab6c1222463513e/Alt-F4%20Tierlist%20%5B2020-05-25%5D%20%5BKRD%5D.png KRD's second Alt-F4 tier list] | 2020-05-25: [http://krd.clansfx.co.uk/dump/276bab3e288c07f91ab6c1222463513e/Alt-F4%20Tierlist%20%5B2020-05-25%5D%20%5BKRD%5D.png KRD's second Alt-F4 tier list] | ||
| + | |||
| + | Feel free to add your own, but please mark it with a date, for context. | ||
| + | |||
| + | === Competitive events === | ||
| + | ==== Cups ==== | ||
| + | On 2nd October 2021, a [[TUS]] [https://www.tus-wa.com/cups/cup-1138/ cup was created] by [[User:Korydex|Korydex]] and was finished after 1 month and a few days. | ||
| + | |||
| + | ==== Leagues ==== | ||
| + | It was also the most voted scheme on the first season of [[Experimental Schemes League]] (ESL), debuting the league. | ||
| + | |||
| + | === Similar ideas === | ||
| + | ==== Before this scheme ==== | ||
| + | The idea of the worms being specialized in determined weapons/F-keys already existed as a [[WWP]] [[Wormpot]] called "Specialist Worm mode", as a text idea wriiten between 2003 to 2008 called [[Team Wormtress]] by [[People/M3ntal|M3ntal]], as a 2009 scheme called "[[Special War]]" [https://www.wmdb.org/9761 released] by [[User:Zed|Zed]], as a [[PX]] scheme [http://px.worms2d.info/forum/viewtopic.php?f=12&t=1992&hilit=specialists released] in 2011 by [[Warehouse of Scheme Creations|WoSC]] community (posted by [[User:DumbBongChow|DumbBongChow]]) called "Specialists", as a 2016 scheme [https://www.tus-wa.com/schemes/scheme-2220/ released] by [[User:STRGRN|STRGRN]] called "[[Specialists]]" too, as a scheme [https://www.tus-wa.com/schemes/scheme-2779/ released] on 2nd April 2019 by [[People/Kradie|Kradie]] called "[[Lucky Strike]]" and as a scheme released on April 2019 by [[User:Goom|Goom]] named "[[Fkey Strike]]". | ||
| + | |||
| + | ==== After this scheme ==== | ||
| + | On 27th October 2020 Kradie [https://www.tus-wa.com/schemes/scheme-3484/ released] [[Active Strike]]. | ||
| + | |||
| + | On 20th February 2022, [[User:PestopaxIsYourGod|PestopaxIsYourGod]] [https://www.tus-wa.com/schemes/scheme-4355 uploaded] a scheme named [[SpecialForces]] to [[TUS]] website with a worm that is the boss according to the rules. | ||
Latest revision as of 04:51, 7 August 2023
| Game setup |
|---|
| Scheme |
| Alt-F4: |
| Map |
| Complex but open random island maps |
| Worms |
| 6 per player (1v1), 3 per player (2v2) |

|
W:A replay: An interesting round of Alt-F4 between KRD and ShyGuy |
| Download · Info |

|
W:A replay: Another rather exciting round of Alt-F4 between the two |
| Download · Info |
Alt-F4 is a highly strategic member of the F-key family of schemes, where worms are only allowed to use weapons that appear in the weapon panel row that the worms are named after (F1, F5, F9, F12...) as well as, in the case of Alt-F4, anything from the F8 row, any utility from the Util. row, and Skip Go. Best of 3 matches are played on random island maps between six 150 HP worms a side, with turn order set to cycle between them randomly. After the 15 minute round timer runs out and sudden death arrives, all worms are set to 1 HP, but water does not rise. Weapon powers in the scheme are set to the standard 3 stars, including the two Ninja Ropes, giving them a single reshoot, but with rope knocking (and by extension Bungee knocking) disabled.
Because the way in which individual rounds play out depends in large part on what worms (F-keys) appear on the battlefield, the scheme allows for an ever-evolving metagame to develop, even without any changes made to its scheme file. Through this mechanism, it is the players, via their choices, who in the long run decide which F-keys are expected to see more play because they just seem individually strong, which ones might only be niche inclusions intended to surprise opponents, which ones warrant going out of your way to kill off early, which ones could potentially be more dangerous in the hands of specific players, or as part of specific team compositions, or on specific maps and so on.
Contents
Rules
- Each worm is only allowed to use weapons from the weapon panel row it is named after + anything from the F8 row + any utility
- Skip Go is also allowed to be used by any worm.
- Surrender is only allowed to be used by any worm in 1v1 matches, where it ends the round.
- In case you accidentally use a weapon your worm is not allowed to use, the punishment for it is skipping go on your following turn, without moving or doing anything else with that worm.
- Unless otherwise agreed upon, using the basic letter-F-and-a-number worm name format is recommended. Stranger formats (for example "F-0010" for F2 in binary, "Fickle Three" for F3, etc.) have been used too, but clarity and competitive fairness can suffer as a result.
- Each player is only allowed at most one of any particular F-key on their team (i.e. no duplicates)
- Although an interesting alternative way of playing allows at most two of any particular F-key per side/alliance. Note however that you won't be able to call two worms on a team the exact same name, so doing something like F9 and F9* is then required, or splitting the F9 worms between two players in 2v2 matches (as you would have to under the standard rule set).
The following "rules" are enforced by the scheme file itself, as of Worms Armageddon 3.8:
- No climbing on top of the indestructible border if playing on cavern maps
- No skipwalking
- No using Bungee from Jet Pack
Strategy and Metagame
On a fundamental level, offering a rough outline of what to expect from Alt-F4 and some guidance on constructing your team, the F-keys appear to fall into a few categories that are distinct both in what they theoretically offer to a team composition, and in terms of how including them usually tends to play out in practice.
Early game heavy hitters that are potentially very strong early, but prone to falling off in power when rounds drag on:
- F7 with unlimited Baseball Bat, Blow Torch and Pneumatic Drill
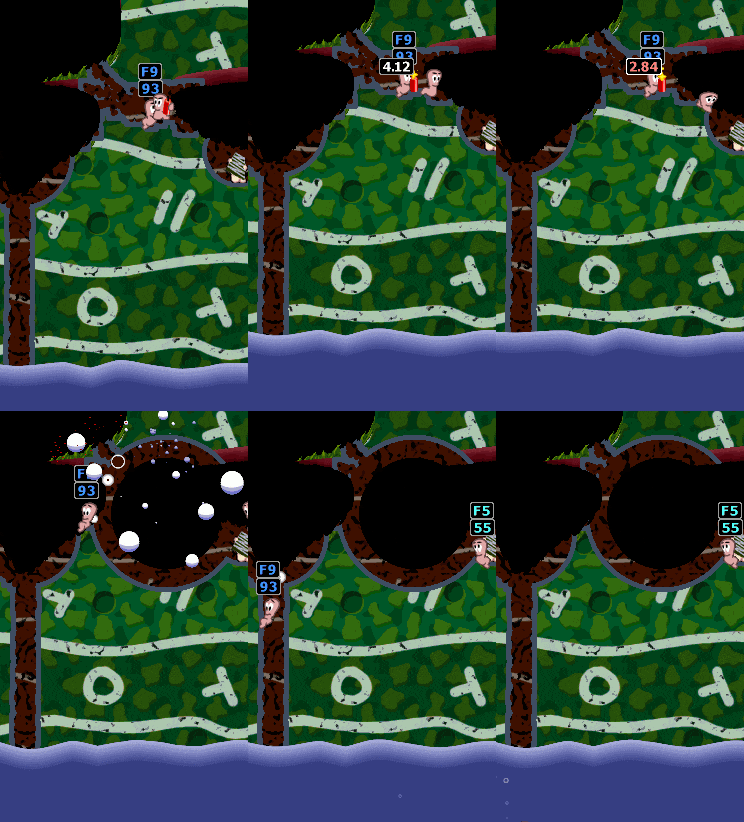
- F9 with unlimited Flame Thrower
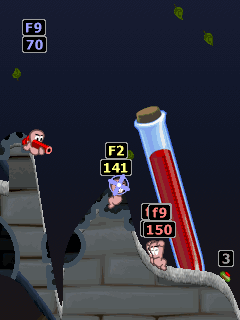
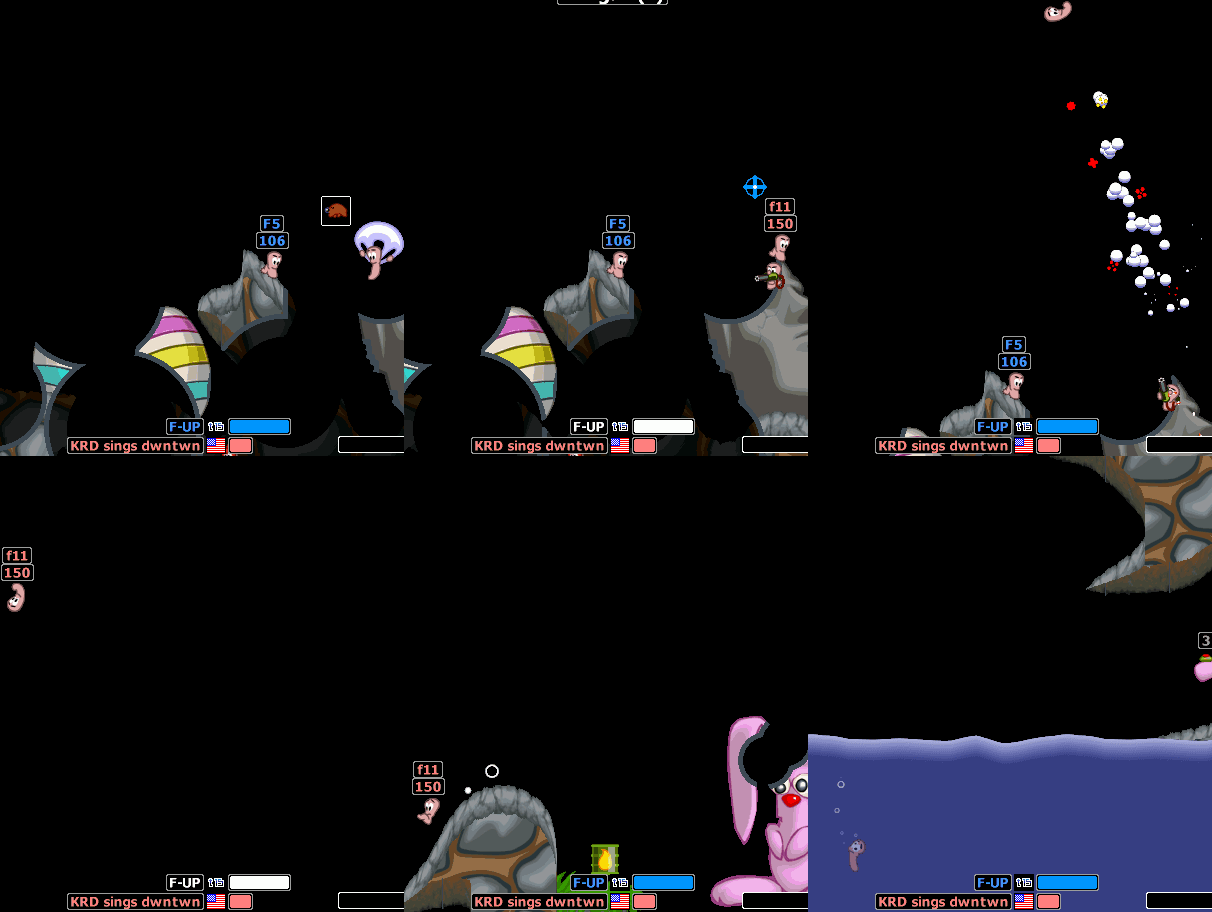
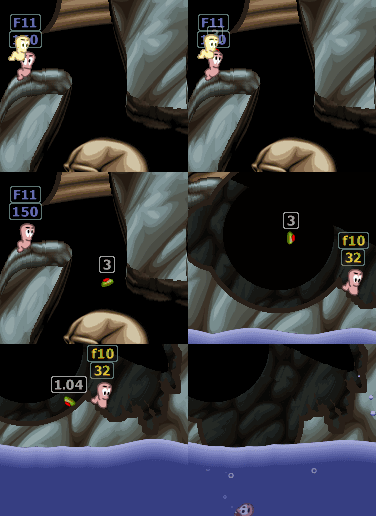
- F11 with 5x Old Woman and literally nothing else
Consistent all-arounders that are generally good at all stages of the game, but do not obviously excel at anything:
- F2 with unlimited Grenade and 2x Battle Axe
- F3 with unlimited Shotgun, Uzi, Handgun, Longbow and 1x Minigun
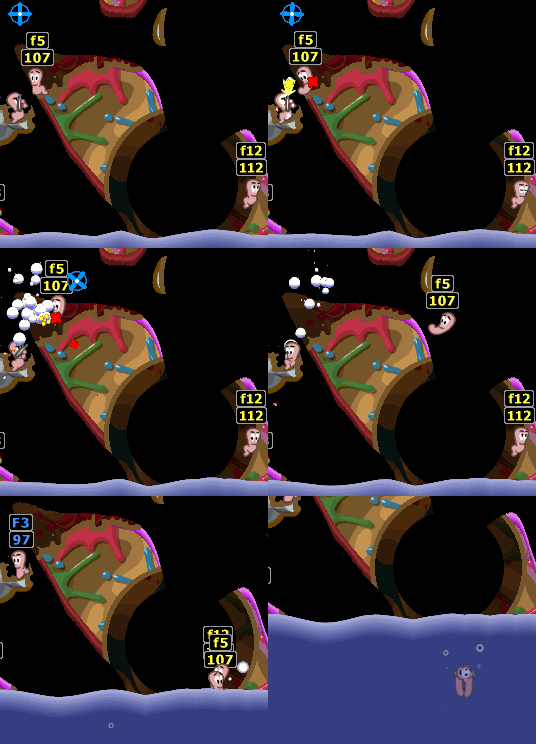
- F5 with unlimited Mine, Mole Bomb and 1x Dynamite
Late game strategies and finishers that allow you to intentionally aim to take rounds late:
- F1 with unlimited Bazooka and 2x Homing Missile
- F10 with unlimited Petrol Bomb and 2x Skunk
Synergistic supports and oddballs that don't do much on their own, but can shine in specific lineups:
- F4 with unlimited Fire Punch, Dragon Ball, Prod and 2x Kamikaze
- F6 with 1x Air Strike, 1x Napalm Strike, 1x Mail Strike, 1x Mine Strike and 1x Mole Squadron
- F12 with unlimited Worm Select and 1x Freeze
Sometimes these categories end up overlapping slightly as well, depending on the details of the situation the worms find themselves in. But figuring out a team composition that is synergistic, not awkward in some crippling way and which simply works for you personally is by design a large part of becoming better at Alt-F4; experimentation, adaptability and experience thus all play an important role. For an approximate idea of how powerful each individual F-key may be, if that's something that you think might be useful, you can have a look at some examples of totally subjective F-key tier lists below, closer to the bottom of this article in the Tier Lists section.
Synergies and Anti-Synergies
A purposefully nonexhaustive listing of suggestions for synergies that might be interesting to experiment with, and anti-synergies that should probably be avoided:
- The F1 and F10 worms are both somewhat late game oriented. Bazookas are, from a distance, good against low health poisoned worms as well as at keeping Petrol Bomb fire alive. Petrol Bombs are themselves good at prolonging rounds and, via blocking, keeping poisoned worms stuck with little to do. Even when their synergy doesn't come together, they remain individually strong during 1 HP sudden death.
- Worms like F4, F5, F7, F9, F10 and F11 who can inflict heavy damage against (or score outright full HP kills on) enemies in specific positions and arrangements obviously benefit greatly from having movement utilities (F8 and Util. rows) at their disposal. Too many of these worms going for too many early power moves can leave you stranded later on, however.
- As a worm that does nothing by itself, F12 is a synergy machine, although likely at its strongest coupled with aggressive early game worms like F7, F9 and F11. F4 with its Kamikaze and F5 with the Dynamite are strong contenders as well.
- When playing 2v2 or following an alternate rule set that allows more than at most one of the same F-key per player, beware of using two of worms like F3, F5, F6 and F11, who all come with a very limited supply of their best (or all) weapons. Because inventories are shared, the anti-synergy of having more than one of these may end up hindering you.
Potential Counters
- Late game, defensively oriented compositions running an F10 worm should be pretty good against aggressive ones that try to finish rounds early, or risk their F12 worm feeling increasingly useless as it watches the other F-keys slowly die to poison ticks, while itself getting ignored and intentionally left for last, at which point it becomes almost entirely useless and a waste of 150 HP. This theory does however require further practical testing.
Tips and Tricks
- The scheme comes with a generous hotseat timer of 10 seconds. Don't forget to make use of it to plan out your turns in advance!
- If you're ever unsure which F-key worm you're currently controlling, tap the delete key four times; that should bring its name tag back down from the sky. Note though that this doesn't work while walking, and usually doesn't help during hotseat.
- Don't forget that Parachute and Bungee come in infinite supply and can be used by any worm. Not only does this significantly increase the offensive range of all F-keys, it can also mean the difference between having to use a limited movement utility or being able to conserve it for later. In the late game, combined with strong wind, securing high ground lets you cover large portions of the map with Parachute alone.
- Your Uzi and Minigun can turn into a Baseball Bat... sometimes. Have a look at this tool-assisted demonstration at 13:18.
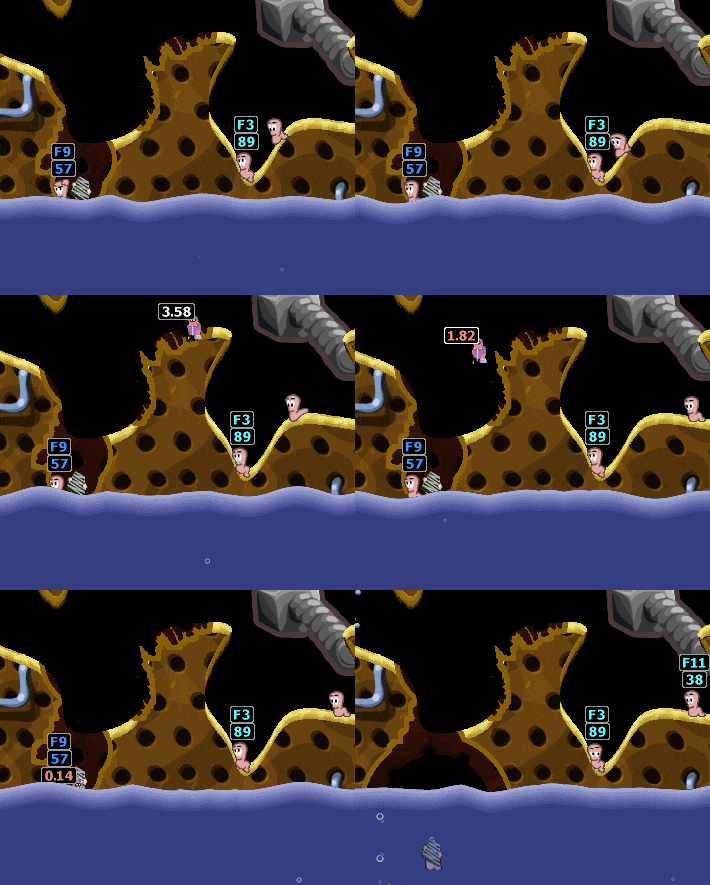
- Mines can be jumped against immediately after being placed, pushing them a significant distance away, especially from a height, onto unsuspecting worms below. It requires some dexterity, a sense of timing, and is often at least somewhat risky. But it's totally a thing that works out majestically sometimes.
- There's a pattern to how the random turn order works in this game. Figure it out or look it up to unlock the full potential of your F12 worm.
History
The final adjustments made to the Alt-F4 scheme file, before its author KRD was happy to begin playtesting it with others more seriously, likely happened on 30th April 2019. These changes included the F7 worm losing Girder but being upgraded to infinite Baseball Bat instead of the single one it had before, as well as the F12 worm having the (only very situationally useful) single Freeze (re)added to its arsenal, to go along Worm Select as its main tool.
The immediate precursor to and main reference in its design was a fellow member of the specialist/F-keys family of schemes, goom's Fkey Strike, which at the time was a popular passtime among those frequenting the #worms IRC channel. Where that version of the concept focused more on approachability (fewer available weapons, of a lower and more equal damage potential) and fun (crates, bungee knocking, a very weak F7 worm that frequently evoked laughter and/or pity), Alt-F4 was to set itself apart by being more competitively minded, with all weapons in it set to the standard 3 stars of power familiar to those used to popular ground schemes such as Elite, Intermediate and Team17. Rules on team creation were somewhat simplified. The overall power level, explosiveness and variety of the available weapons were increased to help diversify individual F-keys, complicate the thinking about the team compositions they might work best in, facilitate more combo potential, and speed gameplay up. The F6 and F11 worms were made stronger but riskier to pick through the decision to allow them to run out of all five of the weapons available to them and become useless in rounds that fail to be won quickly.
At that point, testing began in earnest, with (most notably) ShyGuy and others from #worms completing well over a hundred rounds between them over the next year or so. This helped KRD arrive at the conclusion that the scheme remained fun even when played primarily with the aim to win, that the F-keys in it were balanced well enough not to need further tweaking, and that some of them being or appearing weaker actually made things even more interesting when a player decided to include them as part of their strategy anyway. It was also at this stage that the first so called tier lists appeared, where players grouped the F-keys into tiers based on how good or bad they thought they were, in their experience. Then of course argued about it!
The only thing left to do then was to get started on this WKB article, thereby releasing the scheme into the wild, and watching to see if any leagues, cups, tournaments or streams end up happening that include it.
Tier Lists
Some tier lists, to help keep track of what we have historically thought was good and not good:
2020-05-16: KRD's initial Alt-F4 tier list
2020-05-25: KRD's second Alt-F4 tier list
Feel free to add your own, but please mark it with a date, for context.
Competitive events
Cups
On 2nd October 2021, a TUS cup was created by Korydex and was finished after 1 month and a few days.
Leagues
It was also the most voted scheme on the first season of Experimental Schemes League (ESL), debuting the league.
Similar ideas
Before this scheme
The idea of the worms being specialized in determined weapons/F-keys already existed as a WWP Wormpot called "Specialist Worm mode", as a text idea wriiten between 2003 to 2008 called Team Wormtress by M3ntal, as a 2009 scheme called "Special War" released by Zed, as a PX scheme released in 2011 by WoSC community (posted by DumbBongChow) called "Specialists", as a 2016 scheme released by STRGRN called "Specialists" too, as a scheme released on 2nd April 2019 by Kradie called "Lucky Strike" and as a scheme released on April 2019 by Goom named "Fkey Strike".
After this scheme
On 27th October 2020 Kradie released Active Strike.
On 20th February 2022, PestopaxIsYourGod uploaded a scheme named SpecialForces to TUS website with a worm that is the boss according to the rules.
