Difference between revisions of "Mission walkthrough (Worms World Party)"
From Worms Knowledge Base
Qwertyxp2000 (Talk | contribs) (→Mission 14 - Rainforest Ruckus) |
Qwertyxp2000 (Talk | contribs) (→Mission 33 - Have No Fear, Old Dear) |
||
| (4 intermediate revisions by the same user not shown) | |||
| Line 72: | Line 72: | ||
== Mission 12 - Fruit Bastilles == | == Mission 12 - Fruit Bastilles == | ||
[[file:Thumb12 - Fruit Bastilles.png|thumb|Fruit Bastilles]] | [[file:Thumb12 - Fruit Bastilles.png|thumb|Fruit Bastilles]] | ||
| − | Hurry yourself with the Jetpack (which has a measly 6 units of fuel in this mission) to get up the cherry blossom tree, and use your Low Gravity to jump across the two castles. There is a target that you can destroy with any of your weapons to deploy a crate containing a Fire Punch. The crate will float down towards the mines at the grass, so you would need a Girder in advance to stop its fall. Bungee yourself down the right tree and use your available offensive weapon to send the enemy into the water. Spend as few turns as possible, before the enemy unlocks new weapons to attack you or your helpless vital worm. | + | Hurry yourself with the Jetpack (which has a measly 6 units of fuel in this mission) to get up the cherry blossom tree, and use your Low Gravity to jump across the two castles. There is a target that you can destroy with any of your weapons to deploy a crate containing a Fire Punch. The crate will float down towards the mines at the grass, so you would need a Girder in advance to stop its fall. Bungee yourself down the right tree and use your available offensive weapon to send the enemy into the water. Spend as few turns as possible, before the enemy unlocks new weapons to attack you or your helpless vital worm. Note that in this mission, you can perform multiple weapons on your turn, allowing you to use a Girder and a Baseball Bat on the same turn to secure the Fire Punch crate. |
<br clear="all"> | <br clear="all"> | ||
| Line 86: | Line 86: | ||
== Mission 14 - Rainforest Ruckus == | == Mission 14 - Rainforest Ruckus == | ||
[[file:Thumb14 - Rainforest Ruckus.png|thumb|Rainforest Ruckus]] | [[file:Thumb14 - Rainforest Ruckus.png|thumb|Rainforest Ruckus]] | ||
| − | In this mission, your aim is to use the Ninja Rope to move around the landscape and launch your limited weapons at your enemies as quickly as possible within your available turns. Luckily, in this mission, using a weapon will not trigger retreat time; you can spam weapons at your leisure. Unlike you, your enemy will fire slowly and they can choose any of their worms to start blasting you. | + | In this mission, your aim is to use the Ninja Rope to move around the landscape and launch your limited weapons at your enemies as quickly as possible within your available turns. Luckily, in this mission, using a weapon will not trigger retreat time; you can spam weapons at your leisure. Unlike you, your enemy will fire slowly and they can choose any of their worms to start blasting you. Your worm has 150 health. |
To begin, you will need to Blowtorch out of the tree trunk to then Ninja Rope your way around the landscape as you mercilessly target your exposed enemies with your weapons. You will need to show proficiency with the Ninja Rope to get around the landscape, rather than wasting your weapons to just plow through the landscape. Learning how to retreat from your rope after dropping weapons is an important skill, allowing you to perform a tactic involving carpet-bombing enemy worms with your Grenades or Cluster Bombs. | To begin, you will need to Blowtorch out of the tree trunk to then Ninja Rope your way around the landscape as you mercilessly target your exposed enemies with your weapons. You will need to show proficiency with the Ninja Rope to get around the landscape, rather than wasting your weapons to just plow through the landscape. Learning how to retreat from your rope after dropping weapons is an important skill, allowing you to perform a tactic involving carpet-bombing enemy worms with your Grenades or Cluster Bombs. | ||
| Line 99: | Line 99: | ||
== Mission 16 - Bookworm == | == Mission 16 - Bookworm == | ||
[[file:Thumb16 - Bookworm.png|thumb|Bookworm]] | [[file:Thumb16 - Bookworm.png|thumb|Bookworm]] | ||
| + | Quickly navigate your way across the books so you can use your Prod to toss your enemy into the stacks of mines. But before then, watch out for the time. You will be supplied several Fast Walks to assist your otherwise sluggish movement speed. Your girders will be useful for protecting you from the enemy worm's Grenades. | ||
<br clear="all"> | <br clear="all"> | ||
| Line 107: | Line 108: | ||
== Mission 18 - Pole To Pole == | == Mission 18 - Pole To Pole == | ||
[[file:Thumb18 - Pole To Pole.png|thumb|Pole To Pole]] | [[file:Thumb18 - Pole To Pole.png|thumb|Pole To Pole]] | ||
| + | Much like Apple Of Your Eye, this is a mission that relies on timing your jumps to avoid the moving mines. However, the platforms are straight and mines bounce upwards from the bottom. You got a generous 100 seconds to reach the final platform to kill the enemy worm with the crate containing a Fire Punch, but you'll need to be extra prepared to dodge all of the mines. As your worm only has 10 health, a single mine explosion is enough to lose the mission. | ||
| + | |||
| + | As a tip, jump to the next platform after the mines fall down, and time a backflip to dodge mines on your current platform. | ||
<br clear="all"> | <br clear="all"> | ||
| Line 168: | Line 172: | ||
== Mission 33 - Have No Fear, Old Dear == | == Mission 33 - Have No Fear, Old Dear == | ||
[[file:Thumb33 - Have No Fear, Old Dear.png|thumb|Have No Fear, Old Dear]] | [[file:Thumb33 - Have No Fear, Old Dear.png|thumb|Have No Fear, Old Dear]] | ||
| + | Using your Bazooka, kill all enemy worms hidden inside the indestructible wells, while avoiding the falling old women, all within 100 seconds of a single turn. Like the old women in Uzi Training, hitting an old woman loses time; damaging her makes her pop and removes 5 seconds from your remaining time. You cannot move, only standing on top of the windmill. The lack of wind means you only need to rely on the trajectory of each bazooka shot without accounting for wind direction. | ||
<br clear="all"/> | <br clear="all"/> | ||
Revision as of 08:13, 7 July 2024
Disclaimer: The following textual guides are by far not the only ways of beating WWP's missions. They are only meant to help you out when you're out of ideas.
| |
This article has a to-do list: |
|
Contents
- 1 Mission 1 - Good Ship Armageddon
- 2 Mission 2 - Doo Wop
- 3 Mission 3 - Jumble Sail
- 4 Mission 4 - Shell Shock
- 5 Mission 5 - It's Raining Mines, Hallelujah
- 6 Mission 6 - Take Out The Trash
- 7 Mission 7 - Missile Base
- 8 Mission 8 - Woodland
- 9 Mission 9 - Jumpjet Defense
- 10 Mission 10 - Operation Alcatraz
- 11 Mission 11 - Apple Of Your Eye
- 12 Mission 12 - Fruit Bastilles
- 13 Mission 13 - Stairway to Armageddon
- 14 Mission 14 - Rainforest Ruckus
- 15 Mission 15 - Castle Hassle
- 16 Mission 16 - Bookworm
- 17 Mission 17 - Parachute Problems
- 18 Mission 18 - Pole To Pole
- 19 Mission 19 - Island Antics
- 20 Mission 20 - Berlin Boss
- 21 Mission 21 - Windymill On High
- 22 Mission 22 - Bunged Up
- 23 Mission 23 - Steeple Jack
- 24 Mission 24 - Radical Rescue
- 25 Mission 25 - Roping With Dinosaurs
- 26 Mission 26 - Rescue Me
- 27 Mission 27 - Jegg Central
- 28 Mission 28 - Chase The Ace
- 29 Mission 29 - Rule The Rooster
- 30 Mission 30 - Super Tricky Sheep
- 31 Mission 31 - Down On The Farm
- 32 Mission 32 - Icy Encounter
- 33 Mission 33 - Have No Fear, Old Dear
- 34 Mission 34 - Back And Forth
- 35 Mission 35 - Beachside Juggler
- 36 Mission 36 - End Of The Line
- 37 Mission 37 - Take'em Down
- 38 Mission 38 - Pie Eating Piper
- 39 Mission 39 - Plane Crazy
- 40 Mission 40 - All Aboard
- 41 Mission 41 - Bungee Fun
- 42 Mission 42 - Hindenburger
- 43 Mission 43 - Puzzle At T'Mill
- 44 Mission 44 - Revenge at Stonehedge
- 45 Mission 45 - Invertebrate Invaders
- 46 See also
- 47 External links
Mission 1 - Good Ship Armageddon
Your aim is to collect the vital crate at the top of the ship. Use the two girders to get up from the rowboat. Afterwards, use your Jetpack to lift yourself up above the ship's flag. Don't worry if you can't immediately jetpack to the vital crate; the crate nearby the vital crate contains a Teleport.
Mission 2 - Doo Wop
Drill holes with your Pneumatic Drill to reach the bottom and kill that enemy worm. You will need to conserve your limited Pneumatic Drills by digging the right holes. Some mines are present to allow you to break more of the terrain, but try to dodge the explosions if possible. If you reach the bottom platform, you will find a Baseball Bat, but you can still kill the enemy worm with your Pneumatic Drill.
Mission 3 - Jumble Sail
The first deathmatch-style mission. You will want to focus on knocking the first closest enemy worm to the water before using the rest of your weapons to destroy the other worms on the left ship. Your Jetpack may be helpful to get yourself to the left ship.
Mission 4 - Shell Shock
This mission is much different from a typical beat-the-enemy mission; health crates stock up "ammo" for the ship that your worm is riding upon. The intended solution for this mission is to collect a certain number of health crates, drop to the seat of the ship, and the mines will shoot at the enemy worms like a cannon. The girder provided will provide some protection against the shock of the mines.
Mission 5 - It's Raining Mines, Hallelujah
- Note: the name of this mission is probably a reference to the song It's Raining Men by The Weather Girls (see References to other media).
Your worm must use the Jetpack to cross raining mines multiple times, starting with grabbing the crate for the 2x Mines, then going the opposite side of the lollipops to drop a Mine at an enemy worm, and dropping a Mine on the other enemy worm, and then fly to safety. Your Jetpack has 100 units of fuel, meaning you won't need to worry too much about efficient usage of it, but you still need to avoid spending too long in the air. You can take your worm on a break between flights by landing on a safe location before continuing the next flight.
Mission 6 - Take Out The Trash
Use a girder to get up between the first building and the tall left building. Some mines will rain down from above after the end of the opponent's turn, between the two tall buildings. You will need to be careful with placing the next girders; try spacing the girders to avoid the mines falling on them. Use your Low Gravity once you reached the tall right building, and quickly run and jump to the bottom while your Low Gravity is active. Collect that vital crate, which contains a Patsy's Magic Bullet, and aim at the middle of the three enemy worms.
Mission 7 - Missile Base
Use your Blowtorches to traverse through the terrain. Be mindful of how you use your Blowtorches and where you begin and move your worm. Also mind that the opponent can throw Grenades at you; before ending each turn, retreat to the middle of a tunnel, where Grenades won't be so useful.
Mission 8 - Woodland
Your aim is to collect the vital crate at the very right of the landscape. With a limited amount of mobility tools and "shoveling" weapons, traverse through the cliffs without your enemy picking off your health points. Your enemies will be loaded with Handguns and cannot move themselves. In this mission, Jetpacks only have 10 units of fuel.
On the first turn, you will need to use your Girder to secure the utility crate that would otherwise be dropped in the water; it contains two Jetpacks with low fuel. The first Jetpack should be enough for you to lift yourself up to the protruding left cliff. There are multiple solutions to get past the rest of the cliffs. For instance, the Girder can be used to get yourself up the highest cliff, and your Blowtorches will allow you to get through the landscape.
Mission 9 - Jumpjet Defense
Be careful when using your Jetpack to avoid the activated Armageddon to kill the enemy worm. Anticipate where the meteors of the Armageddon will aim. You have 200 fuel for your Jetpack in this mission.
Mission 10 - Operation Alcatraz
The hardest part of this mission actually is to perform jumps correctly with your Low Gravity in use. To correctly jump over the boat with your two backflips, the first backflip should reach the leaf of the boat, and don't be afraid to stay close to the edge afterwards to make the second backflip up to the mast. You will need to find a way to get across to the island with your respectable amount of weapons available. Destroying the enemies with direct line of sight before reaching for that vital crate may be useful if you cannot complete the manoeuver to that vital crate after your second turn.
Mission 11 - Apple Of Your Eye
This mission is all about timing your jumps across the apples to avoid getting struck by the mines, and quickly strike the enemy with a Fire Punch before the 60 seconds run out. Your respectable 100 health gives you room for up to 3 mine explosions. At the Bronze stage, you will be provided with a Fast Walk to help you quickly run to the next apples.
Mission 12 - Fruit Bastilles
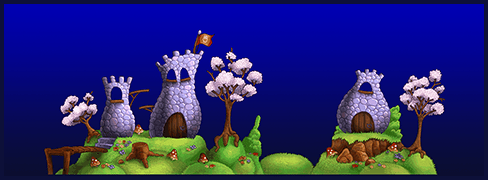
Hurry yourself with the Jetpack (which has a measly 6 units of fuel in this mission) to get up the cherry blossom tree, and use your Low Gravity to jump across the two castles. There is a target that you can destroy with any of your weapons to deploy a crate containing a Fire Punch. The crate will float down towards the mines at the grass, so you would need a Girder in advance to stop its fall. Bungee yourself down the right tree and use your available offensive weapon to send the enemy into the water. Spend as few turns as possible, before the enemy unlocks new weapons to attack you or your helpless vital worm. Note that in this mission, you can perform multiple weapons on your turn, allowing you to use a Girder and a Baseball Bat on the same turn to secure the Fire Punch crate.
Mission 13 - Stairway to Armageddon
- Note: the name of this mission is probably a reference to the song Stairway to Heaven by Led Zeppelin (see References to other media).
Shotgun the targets to help get up to the top, building "ladders" of the staircases. As you make way up the ladders, remember to conserve your Shotguns. Note that you can destroy up to two adjacent targets with each Shotgun shot; aim between the two targets to achieve this. The second and third "staircases" contain mines that you'd need to dispatch with your Shotgun. The second "staircase" just involves removing one target to push down the layers of the third column. The third "staircase" requires you to knock back the mine with the destruction of a target; aim at the mine such that it falls off the stacks of targets.
If you get stuck on this level, the game may offer you extra Shotguns.
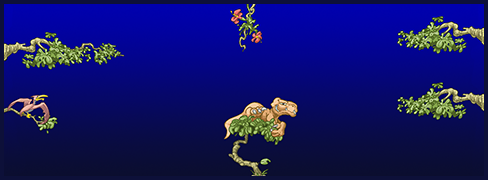
Mission 14 - Rainforest Ruckus
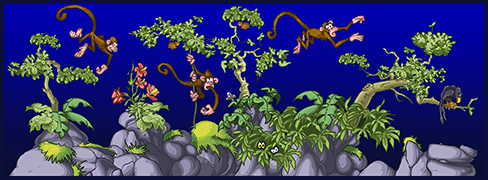
In this mission, your aim is to use the Ninja Rope to move around the landscape and launch your limited weapons at your enemies as quickly as possible within your available turns. Luckily, in this mission, using a weapon will not trigger retreat time; you can spam weapons at your leisure. Unlike you, your enemy will fire slowly and they can choose any of their worms to start blasting you. Your worm has 150 health.
To begin, you will need to Blowtorch out of the tree trunk to then Ninja Rope your way around the landscape as you mercilessly target your exposed enemies with your weapons. You will need to show proficiency with the Ninja Rope to get around the landscape, rather than wasting your weapons to just plow through the landscape. Learning how to retreat from your rope after dropping weapons is an important skill, allowing you to perform a tactic involving carpet-bombing enemy worms with your Grenades or Cluster Bombs.
It is possible to complete this mission in one single turn. However, most players will have difficulty roping around the entire landscape within the 35 seconds per turn and still kill all three enemy worms; if you're having trouble, always aim for the most exposed worm in your turn and ensure that worm is dead by the end of your turn.
Mission 15 - Castle Hassle
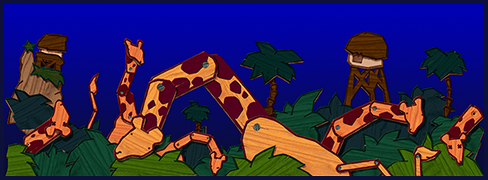
Mission 16 - Bookworm
Quickly navigate your way across the books so you can use your Prod to toss your enemy into the stacks of mines. But before then, watch out for the time. You will be supplied several Fast Walks to assist your otherwise sluggish movement speed. Your girders will be useful for protecting you from the enemy worm's Grenades.
Mission 17 - Parachute Problems
Mission 18 - Pole To Pole
Much like Apple Of Your Eye, this is a mission that relies on timing your jumps to avoid the moving mines. However, the platforms are straight and mines bounce upwards from the bottom. You got a generous 100 seconds to reach the final platform to kill the enemy worm with the crate containing a Fire Punch, but you'll need to be extra prepared to dodge all of the mines. As your worm only has 10 health, a single mine explosion is enough to lose the mission.
As a tip, jump to the next platform after the mines fall down, and time a backflip to dodge mines on your current platform.
Mission 19 - Island Antics
Mission 20 - Berlin Boss
Mission 21 - Windymill On High
Mission 22 - Bunged Up
Mission 23 - Steeple Jack
Mission 24 - Radical Rescue
Mission 25 - Roping With Dinosaurs
Mission 26 - Rescue Me
Mission 27 - Jegg Central
Depending on your version of the game, Jegg Central is completed in distinct ways. On the PC version, you will use your Longbow to create massive arrow bridges across the terrain and aim at targets, whereas on the PlayStation version you use Girders to bridge across and Shotguns to aim at targets. Either way, aim accurately at the targets from different points of the landscape, and then finally collect the very last crate before the timer runs out.
Mission 28 - Chase The Ace
Mission 29 - Rule The Rooster
Mission 30 - Super Tricky Sheep
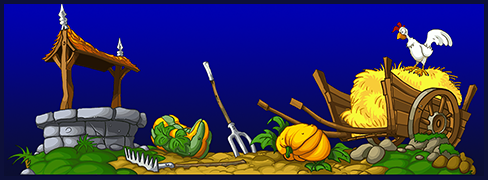
Mission 31 - Down On The Farm
Mission 32 - Icy Encounter
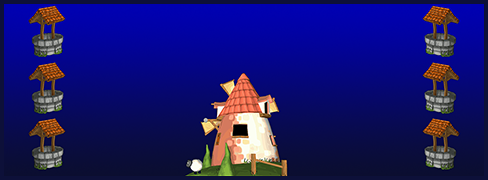
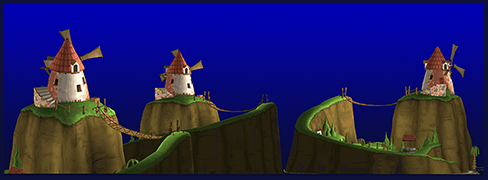
Mission 33 - Have No Fear, Old Dear
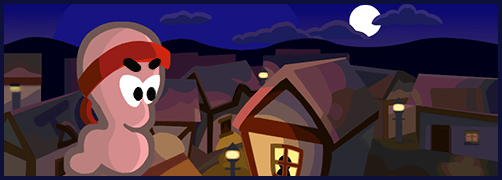
Using your Bazooka, kill all enemy worms hidden inside the indestructible wells, while avoiding the falling old women, all within 100 seconds of a single turn. Like the old women in Uzi Training, hitting an old woman loses time; damaging her makes her pop and removes 5 seconds from your remaining time. You cannot move, only standing on top of the windmill. The lack of wind means you only need to rely on the trajectory of each bazooka shot without accounting for wind direction.
Mission 34 - Back And Forth
Mission 35 - Beachside Juggler
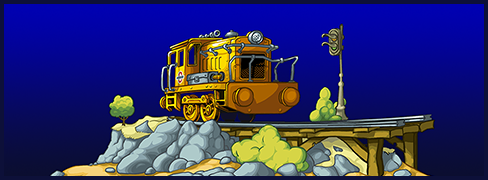
Mission 36 - End Of The Line
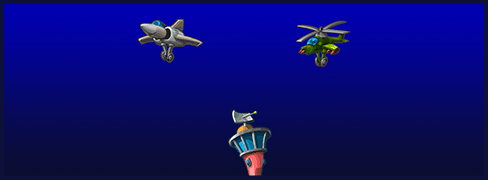
Mission 37 - Take'em Down
Mission 38 - Pie Eating Piper
Mission 39 - Plane Crazy
Mission 40 - All Aboard
Mission 41 - Bungee Fun
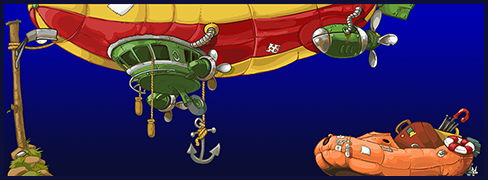
Mission 42 - Hindenburger
Mission 43 - Puzzle At T'Mill
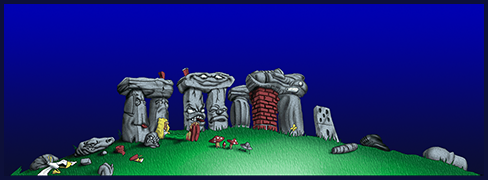
Mission 44 - Revenge at Stonehedge
Mission 45 - Invertebrate Invaders
See also
External links
There is a page on speedrun.com dedicated to leaderboards for unassisted Worms World Party speedrunning categories, including the "All Missions" category. To qualify for placement in that category, players must follow the posted rules visible when clicking "View Rules" on that page.
