Difference between revisions of "Holy War"
From Worms Knowledge Base
m (→Standard scheme: these settings are all wrong and need fixed later) |
CyberShadow (Talk | contribs) m (Text replace - "http://www.nanacide.com/wahelp/" to "http://wahelp.worms2d.info/") |
||
| (15 intermediate revisions by 7 users not shown) | |||
| Line 1: | Line 1: | ||
{{ParentArticle|[[Schemes]]}} | {{ParentArticle|[[Schemes]]}} | ||
| − | [[ | + | {{ReplayBox|Holy_War.wagame|An example of a Holy War game with Random00,|SPW, Balee and Crok; taken from [[Worm Olympics]]}} |
| + | [[Image:Holy_war.png|thumb|Build girders and say your prayers!]] | ||
| + | {{Game_setup | ||
| + | |file=Holy_war.wsc | ||
| + | |scheme=Holy war | ||
| + | |map=A blank map (usually, a single speck is included, as this ensures a unique arrangement of starting girders) | ||
| + | |worms=As many as possible | ||
| + | }} | ||
| − | + | The '''Holy War''' scheme revolves around lobbing [[Holy Hand Grenade]]s across an empty map, while filling that map with countless girders. Along with [[Girder Starter Pack]]s and Holies, players are also provided with unlimited [[Parachute]], [[Bungee]], and the invaluable [[Teleport]] to help them move around. The first few turns of the game usually see players spamming the map with girders, building funnels, bridges, blocking shots and, for the more insidious player, imprisoning enemy worms in tight spaces. | |
| − | + | ||
| − | + | A steady supply of utility crates spice the scheme up, giving players a strong incentive to establish access routes around the map for collecting them (and denying other players the same ability). Due to a unique quirk in the crate generation code, the occasional weapon crate also appears - and it always contains a superweapon. | |
| − | + | ||
| − | + | ||
| − | + | ||
| − | + | ||
| − | + | ||
| − | + | ||
| − | + | ||
| − | + | Despite not being popular in leagues or tournaments, the scheme is remarkably consistent, rarely deviating from the settings it is commonly played with. One variation however sees the scheme played without parachute (to reduce luck of the wind) and - more significantly - without retreat time, which makes dropping a Holy Hand Grenade for an easy kill a far riskier venture. | |
| − | + | ||
| − | == | + | == Tricks == |
| − | + | [[Image:Holy War trick animation.gif|thumb|left|How to avoid drowning when blasting yourself.]] | |
| − | + | If there's is another girder under the one your worm is standing on and an opponent worm is on the same girder as you (or on one that is really close), it is possible to kill the opponent worm while your worm survives. First, you have to aim the Holy Hand Grenade down and fire it. Do not move from your position. After the blast, the opponent worm will fly away and probably drown, but your worm will fall on the girder below and survive. Of course, the blast reduces your life points considerably, so this trick only works if your worm is healthy enough. | |
| − | + | If you move your worm a bit in any direction after you dropped the grenade but before it explodes, your worm will fly in steep angle, so if the girder below isn't exactly under your worm, you can still make sure it will survive. This requires practice and a bit of luck, though. | |
| + | |||
| + | {{clear}} | ||
| + | == External links == | ||
| + | * [http://wahelp.worms2d.info/scheme-holywar.php Holy War] on Nanacide | ||
| + | |||
| + | {{todo | ||
| + | | variation download (requires modification to game setup infobox) | ||
| + | }} | ||
Revision as of 21:45, 3 October 2010

|
W:A replay: An example of a Holy War game with Random00, SPW, Balee and Crok; taken from Worm Olympics |
| Download · Info |
| Game setup |
|---|
| Scheme |
| Holy war: |
| Map |
| A blank map (usually, a single speck is included, as this ensures a unique arrangement of starting girders) |
| Worms |
| As many as possible |
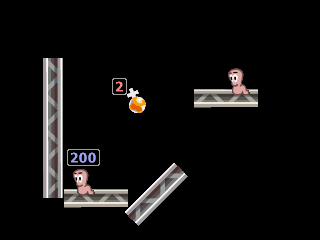
The Holy War scheme revolves around lobbing Holy Hand Grenades across an empty map, while filling that map with countless girders. Along with Girder Starter Packs and Holies, players are also provided with unlimited Parachute, Bungee, and the invaluable Teleport to help them move around. The first few turns of the game usually see players spamming the map with girders, building funnels, bridges, blocking shots and, for the more insidious player, imprisoning enemy worms in tight spaces.
A steady supply of utility crates spice the scheme up, giving players a strong incentive to establish access routes around the map for collecting them (and denying other players the same ability). Due to a unique quirk in the crate generation code, the occasional weapon crate also appears - and it always contains a superweapon.
Despite not being popular in leagues or tournaments, the scheme is remarkably consistent, rarely deviating from the settings it is commonly played with. One variation however sees the scheme played without parachute (to reduce luck of the wind) and - more significantly - without retreat time, which makes dropping a Holy Hand Grenade for an easy kill a far riskier venture.
Tricks
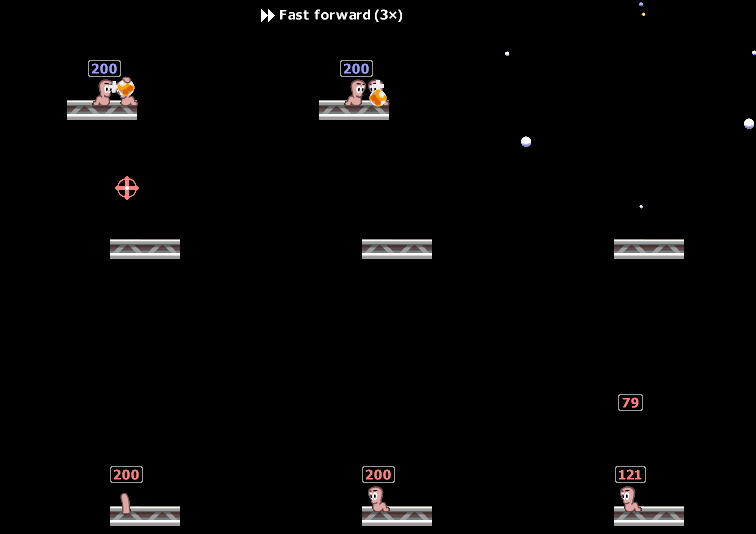
If there's is another girder under the one your worm is standing on and an opponent worm is on the same girder as you (or on one that is really close), it is possible to kill the opponent worm while your worm survives. First, you have to aim the Holy Hand Grenade down and fire it. Do not move from your position. After the blast, the opponent worm will fly away and probably drown, but your worm will fall on the girder below and survive. Of course, the blast reduces your life points considerably, so this trick only works if your worm is healthy enough. If you move your worm a bit in any direction after you dropped the grenade but before it explodes, your worm will fly in steep angle, so if the girder below isn't exactly under your worm, you can still make sure it will survive. This requires practice and a bit of luck, though.
External links
- Holy War on Nanacide
| |
This article has a to-do list: |
|

